Showing posts with label cooking. Show all posts

9.28.2019

The joy of cooking

I've been trying to figure out what to post since my last entry nearly two months ago, but since then, something funny happened. I realized I'm sick of cooking.

Veraci aftermath

It's funny because it's pretty much the main subject of this blog, aside from knitting and sewing.

But on a recent evening I stood in the kitchen and told Joel I wasn't sure if I enjoy cooking anymore. It might have sounded like a joke but I actually meant it. I used to approach cooking as a learner; each recipe was something I'd never tried before. Now I look at new recipes and compare them to similar ones I've made and wonder if it's worth bothering with. Or I look at how much time it will take me to make something and then can't stop thinking about the things that must be done (defrosting, soaking, shopping, prepping), and suddenly my whole Saturday revolves around making a dinner we will spend 20 minutes eating. My weekend brain is overtaken by thoughts of what food we need to have in stock in the coming week. This used to be fun. Lately it's pure mental load.

I know I can share that weight, but it's hard for me to let go. It's usually me who cooks and meal plans and grocery shops by default. Joel is a fantastic cook, and I can depend on him to make a great dinner, but it usually happens when I say, "OK, your turn."

We rarely cook together anymore because I am difficult to cook with. What you don't see on this blog is that over the years I've become a domineering know-it-all in the kitchen in the pursuit of being the most excellent home cook, perfecting my timing and honing my technique. It brings out my worst characteristics and I sometimes have to leave the kitchen to get a grip. In short, cooking has made me face what a horrible person I can turn into.

So I've been a bit weary about it all. I'm tired of being a kitchen brat (I would use a different term here but this is a family blog) and also of thinking about what we are going to eat all the time, tired of going to the grocery store and not only getting items needed for dinner but stocking up on things to have on hand or things we might be running out of, or things that are on sale that I later need to figure out what to do with.  I spend so much time thinking about how to be conscientious and economical (eat less meat! eat in season! shop your fridge first!) that I'm not even sure what I'm in the mood to eat these days.

What actually sounds really good right now - and always - is a baked potato, and it could even be microwaved.

But we can't subsist on potatoes...well, that's up for debate...but we won't. So I need to give up some control and let things be loose. I'm trying to see what it's like to only buy groceries that I need right now. While it might be more convenient to try to do bigger shopping trips, it's not like I don't live half a mile from a store and can't run to get an ingredient. The pantry does not have to be constantly stocked. I'm also canceling our frozen meat subscription because that also seems to be adding to this pressure to plan meals.

I know myself well enough to know this phase won't last forever, but what I'm learning about my need to release control is important. If I can figure this out in the kitchen, how else might I apply it in my everyday life? Even in the last week I've felt a slight shift in my approach and a lightening of my attitude toward it. We're still eating home-cooked meals and eating well. I know that cooking can be fun again when I let go of it.


6.01.2019

The Stew

I am extremely conscious about the ways we elevate things only to ruin them. Millennials - my generation - are great at this, mostly because we have the internet to heighten and accelerate the process - though I think every generation is drawn to this phenomenon. And once we've ruined things, we look for other things that were ruined or viewed as uncool or unhealthy by a previous generation (e.g., mayo, MSG, Bob Ross) and give them new life.

As a result, I greet every new trend with an appreciation for Newton's Law. When I hear about something that everyone love-love-loves, I anticipate backlash and keep my distance as long as possible. You may view this as a negative way to view the world, a sad form of self preservation, or just a symptom of the times we live in. I do, too, but I'm fine with it. And yet, in trying so hard to avoid trends, I'm finding that I'm not immune to the sway of the pendulum. I want know what everyone is raving about and why. I just may be a late adopter.

So what bandwagon did I most recently, finally, jump on? I made Alison Roman's #TheStew, a spiced chickpea stew with coconut and turmeric. Roman is a big deal among millennials right now because  home cooking is a big deal (a result of our budgets), and in true millennial fashion, we hashtag it like everyone knows about it, because why waste time explaining when there's the internet? And we exalt Alison Roman not only because recipe developers are finally getting their due, but because it's not enough to just like the food - you can't have a good cult-like following without a leader (see also: Samin Nosrat). She invented the ever-popular chocolate chunk shortbread cookies (a.k.a. #TheCookie), which I made, of course, and loved. And thus we decided everything she gave us is gold. It's very possible that Alison Roman's next career move is to have a Netflix show.

But back to the food: In the case of #thestew, I knew based on ingredients alone that I would like it but wanted to guard any enthusiasm I might have by trying to find something that could have been improved. I did reduce the amount of coconut milk a tad (two cans is a lot - not just from a richness standpoint but for the liquid element of it), and I put the chickpeas you're supposed to reserve for garnish back in the stew at the end because I didn't want cold chickpeas on my stew and there's no point in trying to make this dish pretty.

It was a delicious meal - a hearty, affordable, meatless stew that is worth some hype, regardless of trendiness. Even if Alison Roman eventually (sadly) becomes part of a trend we eventually move on from, or if we discover that chickpeas cause cancer and climate change, this is a recipe worth trying now, while it's hot. I don't think it's any better than other delicious meals you might cook at home - I think it's just surprising to a lot of people how filling and satisfying chickpeas are, and with coconut milk and vitamin-packed greens, how diet-conforming this meal is. Call your vegan coworkers, your gluten-free pals, your lactose-intolerant relatives and have a freaking dinner party again. Because dinner parties are trending (because, you know, home cooking) and you better have something ready. Just don't forget the hashtag when you post about it.


5.29.2019

Mark Bittman's Chicken Adobo


Are you noticing how much food documentation is going on here? It's so exciting to make dinner and eat while it's still light outside. It makes food presentation that much more appetizing, and easy to photograph, even with an old iPhone.

I'm also excited about the recipes I've been trying lately. Between my New York Times cooking subscription, my Milk Street magazine, and Mark Bittman's weekly newsletter, I'm trying all sorts of new things and they've been real winners.

In addition to that, we've been getting meat from Butcher Box delivered every other month or so with its array of frozen, sustainable meats. We get the custom box so we choose between various cuts of chicken, pork and beef, and can add in salmon and other stuff. It helps us plan ahead since we have to think about thaw time, and what the heck we want to do with it when it thaws.

Mark Bittman enticed me with his recipe for chicken adobo just before Memorial Day as the perfect treatment for some bone-in, skin-on chicken thighs and a grill, noting that this is one of his most highly requested and beloved recipes. It's so easy and you can make the first part in advance. And the ingredients are so basic that if you have the chicken, you probably don't need to go to the store, unless you don't have coconut milk and you really want it in the sauce (which is not required).

Have I signed you up, too?

I highly recommend the newsletter, but here's a link to the recipe. I changed nothing other than to use just thighs rather than a whole chicken, and I did use leftover coconut milk I had open in the fridge, but it wasn't the whole amount called for. And I ended up using the broiler rather than the grill to crisp up the finished product because for just the two of us, it made more sense.

Regardless, this chicken was absolutely delicious. I served it with a lemony cabbage and cucumber and mint slaw (ingredients leftover from that thai dish the other night) which was a nice, fresh pairing.

5.27.2019

Ali Slagle's Southern Thai-Style Red Curry

When I mentioned this recipe to Joel, he was quick to ask me to clarify whether this was some Rachael-Ray-esque fusion of cuisines, i.e., the American South meets Bangkok. Chicken curry on shrimp grits, perhaps? Interesting thought, but, thank God, no.

I love recipes like these. One skillet, easy seasoning, big flavor. Easy to do when I get home at 6 p.m. Enough for lunch leftovers the next day. I also love the salad-like toppings you can add: cucumbers, cabbage, carrots (the pre-shredded mixes are my friend), herbs. It's a complete meal.


Southern Thai-Style Red Curry
adapted from Ali Slagle via The New York Times

2 T. neutral oil (I used avocado oil)
1/4 c. red curry paste (I used Thai Kitchen)
1 tsp. ground turmeric
1 jalapeno, thinly sliced, seeded if needed (or other hot chilis)
1 pound ground chicken
1/2 tsp. dark brown sugar
2 tsp. fish sauce
1/4 tsp. lime zest
Optional accompaniments: Rice, shredded carrots/cabbage, sliced cucumber, fried egg, mint, cilantro

Warm the oil in a large skillet over medium. Add the turmeric, curry paste and jalapeno until toasted and fragrant, about 3 minutes.

Add the chicken and cook, breaking up with a spoon. Stir to coat the chicken with the curry mixture, cooking until the chicken is cooked through, about 7 minutes.

Stir in the brown sugar, fish sauce and lime zest until it's mixed well.

Serve on rice with desired toppings.


5.21.2019

Shaved asparagus pizza

Red sauce will always have its place, but I'm discovering how much I love sauceless pizza. Spring veggies with their delicate flavors would be overpowered otherwise.

Here's my take on Smitten Kitchen's Shaved Asparagus Pizza. Per her suggestion, I added red pepper flakes and topped it with egg, but since I also had some leftover roast potatoes, I added those, too. Marvelous.

Shaved Asparagus Pizza

One half-pound of prepared pizza dough (or enough for one pizza size of your choice)
1/2 pound fresh asparagus
Leftover seasoned roasted potatoes, sliced into smaller pieces if large
1 ball fresh mozzarella
1/4 c. freshly grated Parmesan
Olive oil
Salt and pepper
Red pepper flakes
Egg
1 scallion, white and light green parts thinly sliced

1. With a pizza stone placed on the lower oven rack, heat the oven to 500+ degrees.

2. Wash the asparagus. Holding onto the base of the spear, use a vegetable peeler to peel long strands. It helps to do this against a cutting board. The peeler blade may get clogged sometimes, but the point is to pile asparagus shavings and bits on the pizza, so don't worry about it as long as you've got thin slices. Toss the peels in a large bowl with olive oil, salt and pepper. Discard the woody ends of the asparagus. 

3. Spread out the pizza dough to your desired thickness using whatever method you like (press into a pan, or roll it out and place on a peel, etc. - I have a whole explanation of my methods here).

4. Top dough with Parmesan, then dot with mozzarella (I like to tear it into small chunks and place them a couple inches apart on the pizza). Scatter the roast potato, then pile on the asparagus. Sprinkle with red pepper flakes (to taste). Slide into the oven and bake for 10 minutes.

5. Around the 5 minute mark, heat up a small frying pan with a little oil. When hot, add an egg and fry, being careful not to let the yolk overcook. Ideally, the egg should still be cooking when you take out the pizza. A poached egg would also be a nice option. Alternatively, you could crack the egg(s) directly on the pizza around the same time and let it cook in the oven. I haven't worked up the nerve to do this.

6. Take out the pizza. The asparagus should be slightly browned/charred around the edges. Top with sliced scallions and fried egg. Break the yolk a little and spread it a bit over the middle of the pizza so each piece gets an eggy bite. Slice and enjoy. 


5.17.2019

Carrot and Leek Tart

Because it's spring and the farmers' market should have an abundance of leeks and carrots, I am digging this recipe out of my recipe binder archives (handwritten from who-knows-where, circa 2008) to share with anyone who wants something fancy and seasonal. I made it this week for book club and have been enjoying the remnants for lunch.
Pictured at the bottom here...book for scale

Start to finish: 2 hours (due to cooling)

Yields 8 slices. Great for pairing with a salad for a main course.

Tart pastry

1 c. flour
1/4 tsp. salt
2 T. slivered or sliced almonds
4 T. unsalted butter, cold and cut into 1/2-inch dice
2 large egg yolks
1 T. ice water

In the bowl of a food processor, combine the flour, salt and almonds and pulse until almonds are coarsely ground. Add the butter and pulse a few more times (some large butter chunks are OK), then add the egg yolks and ice water and pulse until dough holds together when pressed. Turn the dough out onto a sheet of plastic wrap or wax paper and press into a disc, wrap completely and refrigerate for 30 minutes while you prep the filling.

Filling

A little more than a pound of carrots, peeled and sliced in 1/4-inch rounds
2 large leeks, whites and light greens sliced into half moons, rinsed thoroughly
1 tsp. fresh thyme
2 T. chopped parsley
Salt and pepper
2 T. olive oil
2 T. unsalted butter
2 large eggs
1 c. Parmesan cheese

Heat the oven to 350 degrees.

Heat the olive oil over medium high in a large skillet, then add the leeks and a generous pinch of salt. Cook, stirring often, until leeks are softened and beginning to color, about 6 minutes.

In a large saucepan, combine carrots, 3/4 c. water, thyme, parsley and butter, and salt and pepper to taste. Heat over high until it boils, then reduce to a simmer. Cook until most of the liquid is evaporated and the carrots are cooked, about 20 minutes. Remove from heat and prepare the tart pan.

(We'll get to the eggs and cheese in a moment.)

Tart assembly

Butter or spray for pan
Fine breadcrumbs
1/2 c. Parmesan

Generously grease the sides and removable bottom of a tart pan. I have a small 8-inch pan, so I always end up with extra pastry and filling, but it should fit a standard-sized pan or any shape you wish (including smaller individual pans). Coat the inside with the breadcrumbs and set aside.

Roll the chilled pastry to 1/8 inch thickness and place in the tart pan, gently pressing it to fit in the corners and fluted sides. Place the tart pan back in the fridge while you finish the filling.

Remove about a 1/4 c. of carrot slices for the topping (the original recipe specifies 66 uniform slices, but that's tedious and just for looks). Place the rest of the carrots in the food processor with the pan liquid along with the leeks and pulse 5 or 6 times, but don't puree them. Taste the mixture. If it needs a little salt, add it here.

In a large bowl, combine the carrot-leek mixture with 1 cup of Parmesan, 2 eggs, and a few grinds of pepper and stir until evenly mixed.

Grab your tart pan and spread the mixture evenly on top (you may have more than you need). Top with the reserved carrot slices, then sprinkle with 1/2 c. Parmesan.

Bake until well browned and completely set, about 35-40 minutes. Cool completely before removing the tart from the pan to slice. Serve at room temp.


1.12.2019

Grilling in January: Bon Appetit's Fried Salsa Verde

My memory for year-over-year weather is pretty unreliable, but I feel safe in saying, based on photographic evidence and internet consultation, that this winter has been a mild one in Spokane. Joel's been on a couple bike rides, we haven't had to keep a faucet dripping overnight, and I've seen icicles just once.

On Friday, I even cooked outside. I cleaned off the grill's summer residue and threw a couple of steaks over the fire. I've always thought that grilling is for all seasons, but it hasn't been until this year, when I have an honest-to-goodness grill, and a clear pathway to it, that I've been able to put that thinking into practice. 

The impetus was a recipe I found while deleting photos from my phone. At some point I screenshotted a recipe for a fried salsa verde, and miraculously it was something that still sounded good to me many months later. Even though I hate the thought of frying anything. (I don't care about the method, it's the cleanup that scares me away.)

It was a recipe in which a couple stars aligned: fresh herbs were 50 percent off at Rosauers, and I had everything else but steak (which was cheap) to make this fancy-tasting meal, including some
red potatoes that would be perfect alongside. 

If you've read the last post as well, you'll notice that 2019 is turning out to be a magnificent year for sage.

I promise the salsa verde's there. #candlelitphotoprobs


Fried Salsa Verde
adapted from Bon Appetit

1 c. sage leaves
1/2 c. rosemary leaves
vegetable oil, for frying
Kosher salt

Pour about an inch or two worth of oil in a small saucepan, and heat over medium heat. Test one sage leaf - it should sizzle when you drop it in. When hot enough, drop the remaining sage leaves and fry 15-20 seconds, until the sizzling subsides. Remove with a slotted spoon and place leaves on a paper-towel lined plate. Season with salt. 

Add the rosemary leaves to the hot oil and repeat the process, removing them to a paper-towel lined plate as well and season with more salt.

In a separate bowl, combine...
1/2 c. finely chopped parsley
1 garlic clove, finely grated (I use a Microplane)
2 tsp. red wine vinegar
1/4 c. olive oil
Several grinds black pepper

Crush the fried herbs with your hands (I find this to be easiest - otherwise you could use a mortar and pestal, or try with a spoon and some elbow grease) and blend in with the parsley mixture. Season with salt if needed. Let mixture sit at least 15 minutes and up to 6 hours. 

Serve with steak, potatoes, even a citrus salad. Or eggs. Put it on a sandwich. This stuff is really so good and the texture of the fried herbs is best the day it's made. But I used leftovers the next day and it still tasted excellent.

10.30.2018

Tuesday Soup

Tuesday Soup is something I invented on a Tuesday night, believe it or not. It was also the Tuesday when we didn't win the Mega Millions lottery and its economical ingredients firmly put us in our place as less-than-billionaires. I brought a leek home from the grocery store, pulled some aging broccoli and celery out of the fridge and started chopping. It all went into a pot with butter, smashed garlic, parsley and chicken broth. This was my reminder that you truly don't need much else to have a winning soup on the table in an hour. A fresh loaf of bread (the reason for making the soup in the first place) and a beer rounds this meal nicely. It's nothing fancy, but it's kinda healthy and a good middle-of-the-week dinner.

Tuesday Soup

Ingredients

1 T. butter
1 large leek
1 large head broccoli 
2 stalks celery
2 large or several small cloves garlic
Several sprigs parsley
5 c. chicken stock (or water, or combo)
Lemon slices, for garnish (or lemon pepper is nice, too)
Kosher salt
Pepper

Directions

Thinly slice the white and light green parts of the leek and rinse thoroughly. Cut off the large broccoli stems, thinly slice and add to the leeks. Chop the florets to small chunks and set aside. Chop the celery and add to the leeks and broccoli. 

Heat a stock pot to medium heat, then add the butter. When the butter is melted, add the leeks, broccoli stems and celery and a good toss of kosher salt (1-2 tsp. depending on your taste). Saute for 10-15 minutes until the vegetables are soft and slightly browned, with brown bits on the bottom of the pot. 

Smash the garlic cloves with the back of a knife and add those to the pot. Let them sizzle for a few minutes until very fragrant. Add the broccoli florets and parsley sprigs, followed by the stock/water. The liquid should just barely reach the top of the veggies and look fairly snug; you don't want swimming vegetables. Cover and simmer over low heat for 10-15 minutes. Check with a fork for doneness - the large chunks should be very tender. 

With a blender (or immersion blender), puree the soup until smooth. Add salt and freshly ground pepper to taste. 

Serve with a squeeze of lemon (to taste), or a swirl of yogurt or sour cream. Crispy bacon or homemade croutons would make nice additional garnishes! Better yet, serve with a fresh crusty loaf of bread or grilled cheese sandwich. 

6.11.2018

Mom's Slow Cooked Pepper Steak (instantly!)

Sometimes I look back on old blog posts from years and years ago and try to recall the energy with which I used to approach cooking. Lately I am kind of bored with it and am forcing myself to branch out by buying ingredients without a plan. What should I do with a bundle of spring onions? (I'm still trying to decide. Meanwhile, they wilt in the fridge.) What can I do with tater tots and marinated artichoke hearts? (Eat separately, do not mix.) And didn't I once read a recipe that called for black sesame seeds, because I'm finally seeing them in the store! (Recipe still not found.) Ugh, I am a mess.

My solution this past weekend was to revisit my mom's cookbook and find something familiar that I had not yet made on my own. I know if anyone can appreciate the occasional drudgery of cooking, it's her - and I only know this because she has told me, not because it ever came through in what she put on the table. I keyed in on her recipe for slow cooked pepper steak - made with an unfussy cut of beef (round steak) and bell peppers.

I had intended to slow-cook it as written, but a long bike ride had me looking at my Instant Pot at 5 p.m. I knew that most beef becomes fork-tender after about 35 minutes under pressure, so I just set it for that and crossed my fingers. It turned out splendidly, because of course it would. Below is my mom's original recipe, and my adaptation for the Instant Pot. Both ways will comfort your soul and astound you when you realize there's not enough leftover for tomorrow night's dinner. Oops.

I texted my mom to show her what I did, and she replied that her "lazy" dinner that night was salami sandwiches on Jewish rye. I'd probably enjoy that just as much, but we all know sandwiches taste better when Mom makes them. In the meantime, I was glad to have this bowlful.


Slow Cooked Pepper Steak (Mom's original)

1.5 to 2 lbs. beef round steak
2 T. neutral cooking oil
1/4 c. soy sauce (or tamari)
1 c. chopped onion (1 large)
1 garlic clove, minced
1 tsp. sugar
1/2 tsp. salt
1/4 tsp. pepper
1/4 tsp. ground ginger
4 tomatoes, cut into eighths, or 1 16-oz. can tomatoes with liquid, cut up if whole
2 large green peppers, cut into strips (or a colorful combination)
1/2 c. cold water
1 T. cornstarch
Cooked noodles or rice

Cut beef into 3-inch x 1-inch strips: brown in oil in a skillet. Transfer to slow cooker. Combine the next seven ingredients (through the ginger); pour over beef. Cover and cook on low for 5-6 hours or until meat is tender. Add tomatoes and peppers; cook on low for 1 hr. longer. Combine the cold water and cornstarch to make a paste; stir into liquid in slow cooker and cook on high until thickened. Serve over noodles or rice.

New-Fangled Instant-Potted Pepper Steak

Same ingredients as above

After cutting beef into strips, as above, brown the steak directly in the IP using the saute setting (you may need to do this in batches). Add the next seven ingredients and give the pot a good stir to mix everything together. Add the tomatoes and peppers on top, along with another 1/2 cup of water to be on the safe side (this helps it come to pressure). Close the lid and manually set the pressure to 35 minutes. Let the pressure release naturally 10 minutes (or longer, if you can stand it), then quick-release the rest. Combine the cold water and cornstarch as above, and stir into the mixture. Use the saute function again to bring it back up to a simmer and let it thicken to your liking (this took about 5 minutes). Serve over noodles or rice.

I served it over brown rice, cooked in vegetable broth, with peas thrown in at the last minute. Yum.


1.11.2018

Everything I know about making pizza

I make pizza at least every other week, if not weekly. If I don't know what to make for dinner, it often ends up being pizza. It's always satisfying, pairs perfectly with a salad and glass of wine, and in my opinion, it's fairly healthy because you get to control the ingredients. And despite how often we eat it, it somehow still feels like a special treat. I was thinking about this while making pizza the other day because for many people, making pizza at home feels like an undertaking. I'm here to tell you it's not!  Like a lot of things in life, you just have to decide you want to do it - then do it a few times and realize it's not that hard.

If you want more pizza and less stress in your life, then this is a guide for you. I hope it helps you realize that you can make delicious pizza from scratch in as little as an hour.

And yes, this post is long, but only because I've gone into great detail, not because it's complicated.

Flour, water, yeast and salt

Set yourself up for success, i.e., have these things on hand at all times 

Whenever I go shopping, I make sure to pick up these things if I don't already have them:
  • Canned diced tomatoes: these can be fire-roasted, fancy gourmet, no salt added, etc., but I do try to avoid any that include green chili peppers or anything other than garlic or basil. 
  • Mozzarella cheese: buy it in a ball. It can be the cheap, shrink-wrapped low-moisture kind (Frigo, Kraft, etc.), but I highly recommend stocking up on the fresh mozzarella (also shrink-wrapped) from Trader Joe's. It's cheap and it lasts a week or two in your fridge unopened. Don't worry about the moisture - we'll address that later. But whatever you do, don't buy pre-shredded cheese. If it's all you have, then use it, but if given the choice, make the best one and buy your cheese whole. 
  • Canned olives or other things that come in cans or jars (like anchovies, peppers, artichoke hearts) that keep a long time and you enjoy on pizza
  • Salty meat, if you like it: Cured meats last a good while in your fridge so they're good to purchase for your future pizzas. My favorite is Stockmeyer Prosciutto (also found at Trader Joe's), and again, if left unopened in the fridge it's good for a while. Bacon is also always great on pizza, and many people have that in their fridge already. Or of course, packaged salami (pre-sliced makes it easier) or ham works, too. Here's a tip: go to your deli counter and get 4-5 slices of whatever salami or sausage product looks good. You end up spending about a buck, and you can cut the salami into smaller bits and it's plenty for one pizza. 
  • A variety of vegetables. You should be eating more vegetables anyway, and if you're finding you're not eating them, then make a darn pizza. Onions are a staple for me, and if you have nothing else you'll still have a great pizza. Mushrooms are important to me, too. But it's fun to experiment with a few wild cards, like thinly sliced Brussels spouts, broccoli, kale, scallions, etc.
  • Flour and yeast. Because you can't make dough without them.
Broccoli and pancetta with cream sauce

Equipment
  • A cutting board (to knead dough on, prep toppings, and to cut pizza)
  • Parchment paper
  • A rimless baking sheet or pizza peel
  • A baking stone
  • Rolling pin - experts can get by without one, but we're not experts yet
  • Fine mesh strainer
  • An oven (any ol' electric oven will do - you do NOT need to remodel your kitchen to put in a wood-burning pizza oven. Go out for that kind of pizza.)
  • A bowl and something to cover it, preferably plastic wrap or a large plate
  • Long, sharp chef's knife or some other thing to cut pizza with (I just got one of these for Christmas and it's wonderful). I'm not a huge fan of rolling pizza cutters because it often drags the toppings around, but if you have one, use it!
  • Optional: standing mixer with dough hook
  • Optional: cooling rack

How far to plan in advance

This seems to be the hurdle for a lot of people. You don't need all day - but I would plan for at least an hour from start to finish if you're making dough (10 minutes to make the dough, 30 minutes to let dough rest and prep toppings, 10 minutes to bake, a few minutes to relax). That said, dough made a day or two in advance will taste phenomenal and save you time. Dough made 30 minutes ago will still taste good so don't let time be a barrier! If you absolutely don't have time to make dough, or just don't like making it, then find out which of your local pizzerias sell dough balls. I used to get them from Bennidito's before I got over my mental dough hurdle. Trader Joe's has dough, too. 

Dough

There are a couple different methods I use to make dough, and both work beautifully. 

1. Artisan Bread in 5 Minutes a Day: I started using this no-knead method for pretty much all of my bread products a few years ago, and because of that I often have dough in the fridge ready to be used for pizza or whatever else. Here are the dough instructions from the geniuses who came up with it. You just need a large enough vessel to keep the dough in your fridge, and when you're ready to make pizza, just flour your hands and pull off a grapefruit sized ball for a single pizza, round it into a ball, place it on a lightly floured board and cover with a bowl for about an hour (assuming it's been refrigerated. You can also make the dough the same day, take the dough you need when you're ready, at least a couple hours later, and stick the rest in the fridge and start making your pizza). This dough is the tastiest and has the most satisfying chewy texture of any pizza dough I've used at home. Beautiful air bubbles, crusty edges - it's never failed me, even when I doubt my skills. Another note on starting with cold dough: My kitchen is cold and drafty, so I tend to set my oven to warm for 5 minutes, turn it off, place the dough in an oiled bowl, cover with plastic wrap and place in the warmed oven for 15 minutes to give it a head start.

2. Day-of dough. Because sometimes I don't always have dough in the fridge, and my idea for pizza comes to me as I drive home from work, Deb Perelman's recipe for Rushed Pizza Dough is my standby. I often use the dough hook in my standing mixer to knead the dough, but because it's such a small amount of dough, it's actually a little easier to knead it by hand. Use this recipe, but when you're ready to let it rise, decrease the waiting time by warming your oven for 5 minutes (use the Warm setting, i.e. 170-200 degrees F), turn it off, place the dough in an oiled bowl and cover with plastic wrap and place it in the oven for 30 minutes (similar to above). This dough tastes more like a bland cracker compared to the other dough, but as a vehicle for delicious toppings, it still satisfies.
Prep station

Prepare for pizza

I always bake my pizza on a baking stone. You can use a sheet pan or whatever, but I never do that so my instructions are for using the stone.

At this point, you have risen or mostly risen dough at room temperature, resting somewhere on a lightly floured cutting board or in a bowl.

Next, put the baking stone in the oven on a middle or lower rack and crank the heat to 515-525 degrees F.

Get your rimless sheet pan or pizza peel and place a layer of parchment paper to cover it and set aside.

When the oven has told you it's preheated, it's probably still not quite there, so I don't even begin the next steps until the preheating beep has beeped - that way I always give it a few extra minutes to get good and hot while I assemble the pizza.

On top of the pizza, mis en place

The biggest revelation I've had about pizza toppings is that less is more. Take-and-bake pizza chains led me to believe I needed to completely cover my pizzas with sauce, gobs of cheese and a million toppings, perfectly layered and arranged all around the pizza. When you make pizza at home, this just creates soggy, gross pizza. A modest ladle of sauce, spaced out blobs of cheese, and sprinkles of everything else creates a delicious pizza that allows you to appreciate everything you placed on it once it's cooked.

1. Sauce: RED: Making my own tomato sauce is so easy and so much better than canned or jarred tomato sauce. It's bright and fresh and tomato-y, and you don't need to cook it before slathering it on the pizza. You just need those canned diced tomatoes I mentioned above. (I've used whole, stewed and crushed as well and all work just fine.) One piece of equipment that is helpful in making the sauce is either a mini food chopper or blender or food processor or food mill. Open the can and drain the tomatoes using your mesh strainer. To the drained tomatoes, add either a small clove of garlic or a few shakes of garlic powder, a healthy pinch of salt and another pinch of red pepper flakes. Blend together with whatever machinery you have. Put the blended tomatoes back in the fine mesh strainer and let it drain for a few minutes while you prep the other ingredients (this helps prevent soggy pizza if the tomatoes are especially juicy). After it's drained, taste the sauce. Sometimes I need to add a dash of vinegar for a little more acid, or sugar, but that's rare. Season to your taste and place the sauce in a small bowl. Note: you won't use the whole amount on one pizza.

2. Sauce: WHITE: If you have milk, flour, butter and garlic powder, you can make a quick white sauce. Melt a couple tablespoons of butter in a small saucepan over medium heat. Whisk in a tablespoon of flour until smooth. Add a 1/2 c. of (ideally) whole milk, a splash at a time, whisking smooth after each addition. Add salt and garlic powder to taste (you can always use fresh garlic, too), whisking until the mixture is thick enough to coat a spoon, just a couple minutes. Set aside until you're ready to assemble.

3. Cheese: Pull and tear your mozzarella rather than shred, or use the largest holes of your cheese grater. If you're using fresh cheese, get your hands a little dirty and tear the cheese into inch-or-two pieces. If it feels especially wet, it doesn't hurt to dab it with a towel to remove excess moisture. If you like adding other kinds of soft cheese here, like goat or ricotta, go for it. Or experiment with stronger cheese like aged provolone (divine if you can find it) or fontina or a combination. You'll want to shred or grate those and layer them sparingly.

4. Meat: I don't like biting into large rounds or strips of meat, so I cut it into bite-sized pieces. This way I end up using less, too, because I can sprinkle it more evenly across the pizza. In the case of bacon, I chop it, cook it, and drain it before adding to the pizza. This option is better if you have a bit more time, of course.

5. Vegetables: For the most part, you can just slice, dice, and chop your vegetables and let them cook with the pizza in the oven. When I have more time, however, I enjoy caramelizing the onions.

6. Everything else: Sliced olives, etc. should be at the ready, too.

7. Fresh herbs: I sometimes add fresh thyme or minced rosemary to the toppings, but always add basil after the pizza comes out of the oven, otherwise you won't taste it.
No cheese? No problem. Just make focaccia. Potato and rosemary with flaky sea salt.

Roll it, bake it, mark it with a P

I roll out the rested dough on that floured cutting board, and sometimes I stretch it a little by hand. Generally, I end up with a 12-14" thin crust round. Sometimes I almost break through the dough - if that happens, just pinch it back together. Then carefully lift it and place it on your parchment-lined sheet or peel, reshaping it if needed on the paper. I keep the sheet nearby so I don't have to carry the fragile dough across the room.

Spread the sauce. As I mentioned, you really don't need to coat the pizza with it. Use less than you think you need. It will all kind of blend together through the magic of baking.

Add most of the cheese. I use about half of one small mozzarella ball (the TJ's one). Again, use less than you think you need. I add a little bit more cheese to cover any blatant holes after I've added the rest of the toppings.

Add your other toppings however you'd like, being a little stingy but making sure that any slice will have all the ingredients you want on it in the end.

Feeling fancy? Add a tiny drizzle of olive oil, add any extra cheese you deem necessary.

This is the part that might make you nervous: sliding the pizza in the oven. One of the benefits of not putting a gazillion toppings on a pizza is that it remains somewhat light and fewer things are at risk of hurdling over the top of the pizza when you swiftly slide it on the pizza stone. A couple tricks I've learned:

1. Cut the parchment paper to fit the finished pizza with an inch overhang. This allows it to slide freely but also prevents the paper from charring as it bakes.

2. Position the pizza where you want it to ultimately end up on the pizza stone - don't try to make it fly. This means putting the end of the sheet at the back of the peel, angling it down slightly (careful not to burn yourself on the element above) and then gently jerking back on the sheet as the pizza slides off with the parchment paper. The parchment paper is your best friend in this step. I've tried it without, using cornmeal or flour on the bottom, and have failed and/or ended up with a weirdly shaped pizza.

Bake it for 10 minutes. It always takes 10 minutes. If it doesn't, you might want to get your oven checked out.
Prosciutto and basil

Final moments before eating pizza

While the pizza bakes and cools, I usually have enough time to do the dishes and assemble a quick salad. If nothing else, clear/scrape off your cutting board and make way for cutting the pizza and get your knife ready. And hang onto your pizza peel or baking sheet because you'll need that again to get the pizza out of the oven.

If you're adding fresh basil, or my favorite, arugula (lightly dressed with olive oil, lemon and Parmesan), get that ready to go, too. I sometimes get a small mound of Parmesan ready to sprinkle on the pizza right after it comes out of the oven.

When the pizza is ready, put on an oven mitt, then take your sheet or peel and carefully slide it under the pizza (with or without parchment). The parchment is sometimes strong enough to help you pull the pizza onto the sheet. Place it on the cooling rack (or leave on the peel/sheet) to cool for a couple minutes as you ooh and aah and set the table. Place anything fresh on top after these two minutes have passed. Then slide the pizza from the cooling rack to the cutting board and slice away.
Leek and bacon

A note about moisture and soggy crust

My guide includes steps to reduce the amount of moisture on a pizza, but sometimes, depending on toppings, there may still be small pools of liquid on top. If possible, I dab with a paper towel after the pizza has cooled a couple minutes to help absorb it and prevent that thin, crispy crust from turning to mush. For added insurance against soggy crust, once I cut the pizza I separate the slices to keep them from sitting in a soggy center.

Mistakes make great cooks

Ultimately, this post is built on mistakes I've learned from. There are many great ways to make pizza, but my biggest advice is to find a recipe - for pizza or something else you love - and make it enough times that it you know it all by heart. Memorizing a process opens you up to trying all sorts of variations on the theme. And suddenly you're that person who's pretty good at something, at least enough to write a blog post about it.


12.01.2017

Weekly: Nov. 24 - 30

This morning on my way in to work, I was thinking about how just a week ago, I was watching Matt Lauer on the Macy's Day parade, wondering how much longer people would still watch such a commercialized parade. Little did I know it would be the last time I'd actually watch Mr. Lauer himself. Barf. I, along with everyone else I know, am praying Tom Hanks is still a decent dude. My faith in male celebrities hinges on this. What a horrible spectacle this all is, but glory be to all the women who are braver for this chapter in our culture.


---------

Moving on, then.

What I ate: If you've noticed recent posts on my blog, I'm indulging in butter and stewed prunes. Welcome to the edge! Other things include:

  • A recipe, from my friend Sara, for Mediterranean baked sweet potatoes. She sent me the link last week and at first glance I couldn't understand why she was so wild about it. I'm not that big on sweet potatoes, but I had some left from my last CSA box. On a night when I was on my own for dinner, I had my perfect opportunity to try this out. Verdict: this recipe is worth raving about. It actually reminded me a lot of my favorite recipe for baked falafel with the spices, chickpeas, tahini sauce and tomatoes. If you're intrigued, try it.
  • Sugarplum gingerbread cake, which I blogged about.
  • Peppermint ice cream. Because this is one thing I crave at Christmas time, as I do Celestial Seasonings Nutcracker Sweet tea (which I can't find anywhere in Spokane, harumph).
  • Autumn minestrone, an oldie but a goodie.
  • And these meatballs, another Smitten Kitchen favorite, paired with a perfectly complementary pasta.
What I read:
  • Enormous Changes at the Last Minute by Grace Paley. She was never on my radar before now, and this was published in the 1970s. Her short stories in this collection are challenging and I'm about halfway through them, just relishing and re-reading parts in an attempt to understand what she's really talking about. I am trying not to consult Wikipedia too.
  • My friend Leah contributed a couple pieces to this issue of The California Sunday Magazine, which is devoted to teen voices in this complicated moment in time (though it's never not been complicated). While I consider it a personal mission to not become too out of touch with younger generations, I know I can only understand so much. But several of these stories hit so close to home and also open my eyes to the complex issues and tragedies these teens are dealing with right now, unique to their generation.
Afternoon at Rockwood Bakery
What I watched: 
  • 20th Century Women, available on Netflix streaming right now. I really liked this one, particularly the era in which it was set, the use of music in showing generational divides, voiceovers, the kid who played the son (Lucas Jade Zumann), and Annette Bening. She was so, so good. 
  • Lady Macbeth. Not my cup of tea. 
An unfinished blanket Margot found to collapse on. Alternate title: The Kitty and the Pea

What I listened to:
  • My two song obsessions right now: "Makeba" by Jain and "Soy Yo" by Bomba Estéreo (the videos are awesome, too). 
  • We have listened to a LOT of Natalia Lafourcade this year, and this week was no exception. And I just learned she's on the soundtrack to Coco. (If you're a jazz-standard nerd, you should watch this video for its sweet similarity to "The Nearness of You.")
Other excitement:
  • I decorated for Christmas a little. The tabletop trees are plugged in, but no ornaments yet.
  • A puzzle. We're a week in and it's finally feeling like we're making progress. (It's the Cinque Terre in 2,000 glorious pieces.)


Most of the remaining pieces are shades of blue


11.21.2017

Buttery weekend

Last weekend we were at Auntie's Bookstore and I got that familiar feeling of being overwhelmed by the number of books I will never read. Or the cookbooks I will never cook from.

But worse, holy lords!, my conscience nags, think of all the books that are just sitting on my shelves at home right now, books that are half-read, cookbooks that are barely weathered.

Rather than buying anything new, I returned home and hung out with my books. It's a weird combo of feeling a little depressed and a little grateful. Look at all I don't have. Look at all I do have. Hey, it's the holidays. This feels appropriate.

Rhubarb compote
Also appropriate in this moment: butter-laden recipes. In November and December, butter is cheap, and there are likely things sitting in your freezer or on your counter that could easily be transformed into a sweet or savory filling in a buttery tart dough.

So in the spirit of appreciating what I already have, in one Saturday, I used one well-loved cookbook and one pound of butter to do just that - dinner (big savory tart) and dessert (sweet mini tarts). The cookbook was Deb Perelman's The Smitten Kitchen Cookbook. It's been awhile since I've tried anything new out of it.  (And I've since been tempted to buy her brand new cookbook.) Trying new recipes gives new life to older cookbooks, and until Saturday, this one's pages were mostly well-worn in the pizza dough section (I've since memorized her recipes for pizza sauce and rushed pizza dough).

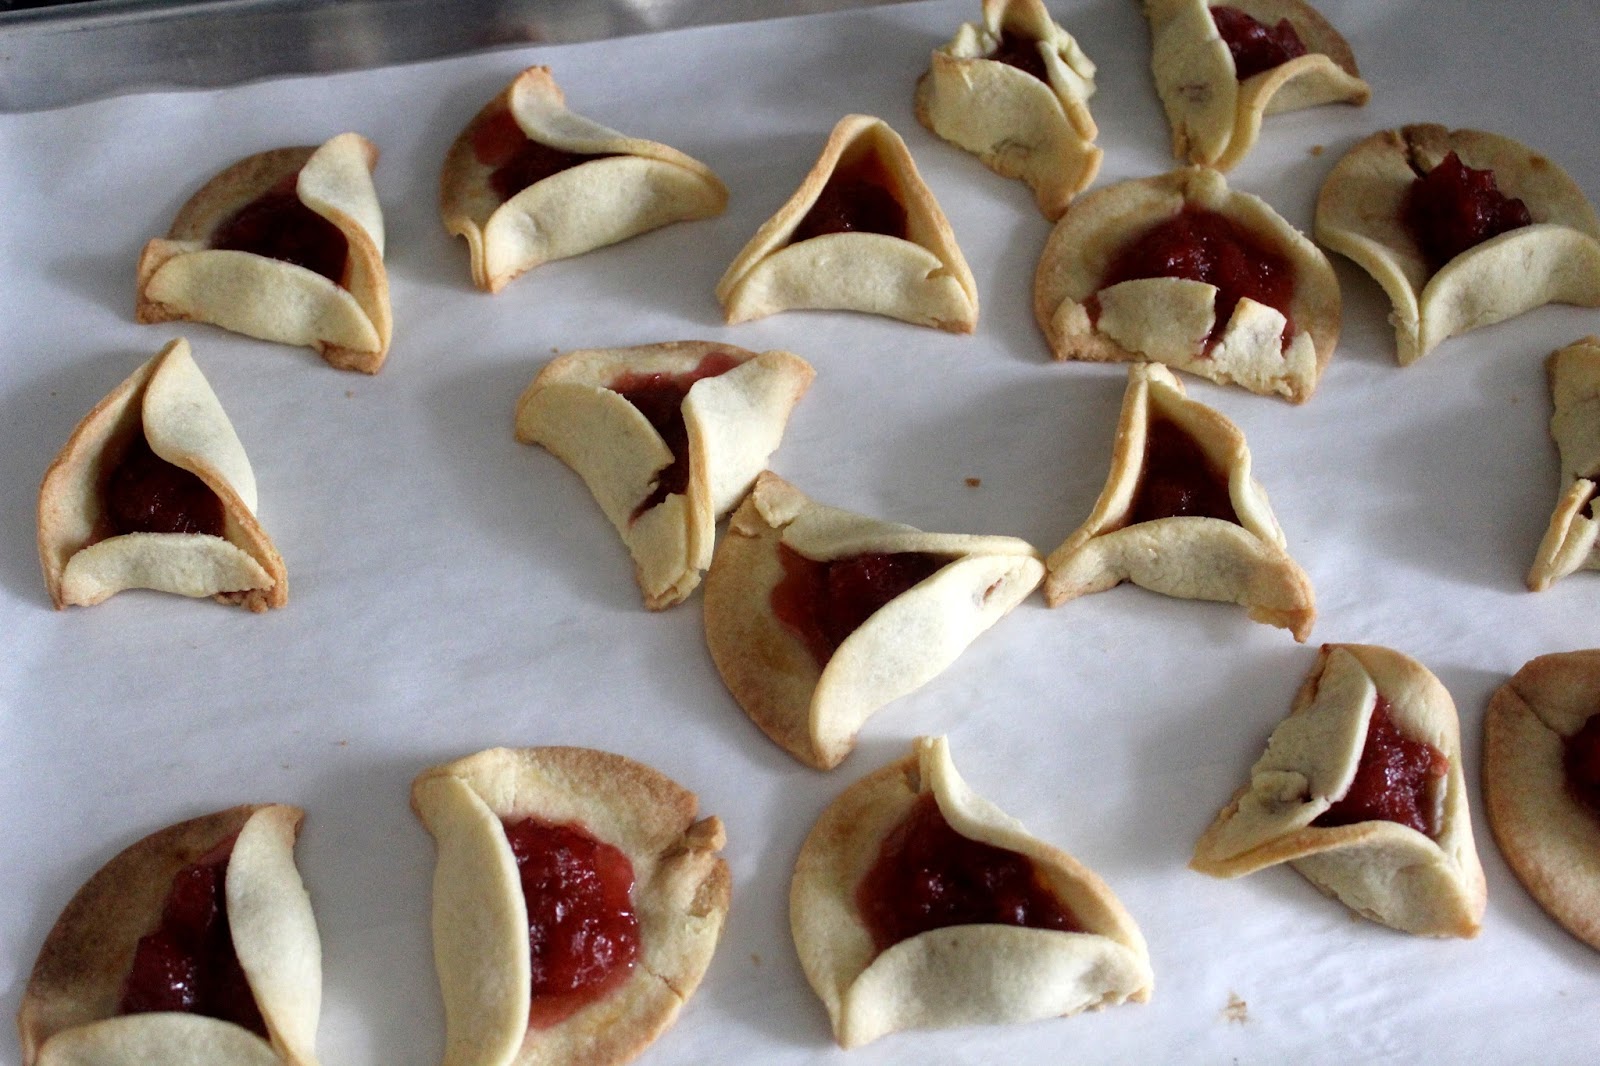
First, I rid my freezer of rhubarb and made her recipe for rhubarb hamantaschen, starting with a simple rhubarb compote.

This is a cookie that's traditionally eaten during the Jewish holiday of Purim. I'm not Jewish, and it's not Purim, but each time I page through the cookbook these catch my eye. They're so pretty, and in the last few years I've become a real fan of jammy cookies.

It was only after I put these in the oven that I learned how difficult it can be to keep the corners together. But I still got a few good triangles, and the taste was what mattered most. If you'd like the recipe, here is one blogger's very enthusiastic transcription of it. 

I didn't let these floppy corners get me down
After a couple of hours, I continued on. Next up in my Smitten Kitchen Saturday was a butternut squash galette.

This tart dough, by comparison, was just as I'd hoped: flaky and melt-in-my-mouth. And it was a dream to work with. I used a combo of white and whole wheat flours, and mixed it with nonfat Greek yogurt and white balsamic vinegar in addition to a stick of butter. The contents included roasted butternut squash, caramelized onions, fontina and fresh thyme (the cookbook calls for thyme, though her original website recipe calls for sage; either would be lovely I'm sure), with just a pinch of cayenne pepper. Pair it with a salad and you really need nothing else for a complete meal.

I only remembered to get a photo of the finished product, right before we sat down to watch The Big Chill (how have I lived my whole life without seeing this movie?!).


I highly recommend this recipe.

I know what you're wondering to yourselves: How does one handle all this butter on a single day? Turns out, you don't need to eat everything in one sitting. You can spread this out over several days or even a week. Enjoy every single bite, savor slowly, and double your normal vegetable intake for awhile. If you feel your conscience try to guilt you about it, be grateful for the very thing that is sitting in front of you on your plate. It's the holidays. This is appropriate.

11.02.2017

The week (and a half)

Halloween sunset

What I read:

  • I finished up Prodigal Summer before the weekend (which made me want to commune with nature...it also made me realize I don't know an ash tree from a chestnut, and don't know a robin's song from a finch's. I even felt compelled to save and study the lives of the boxelder bugs that always make their way into our house. So...I loved this book). 
  • Bored and Brilliant: Quick, thought-provoking read. This is one of those books that makes you grapple with your use of technology, but I liked that it was not an anti-tech book. Just one that makes you think about how to use technology, particularly your smartphone, in smarter ways that don't impede your creativity. The basic idea is that we need to re-learn how to be bored. I came away feeling pretty OK about my phone use, but it made me want to use it even less. 
  • After reading an article about Thoreau in the latest issue of The Atlantic and being totally entranced by the illustrations by Lisel Ashlock that accompanied the piece, I went down a rabbit trail and found that she illustrated a book called Do Unto Animals, which I promptly ordered and started reading. It's a very sweet guide to treating animals humanely whether they're in your home or backyard or on a farm. It was a nice way to follow up on the feelings I was having after reading Prodigal Summer.

Margot cuddling up to Bored and Brilliant

Saturday morning walk with Luna

What I ate: One of the big reasons I bought my Instant Pot this summer was because I learned that Melissa Clark (my favorite living recipe developer) was coming out with a pressure cooker cookbook. I think I ordered my Instant Pot and pre-ordered that cookbook, Dinner in an Instant, on the same day. The cookbook arrived a couple weeks ago, and we tried out her recipe for smoky lentils and sausage on Halloween. Great success! If you have an Instant Pot and eat meat, you should probably get her book.

On Saturday, I had the greatest excuse to make pretzels: a neighborhood Oktoberfest party. I think pretzels might be one of my most favorite things to make. The dough is so fun to work with and the finished product is so satisfying.

And it's officially soup season (YES!), so I returned to an old favorite recipe for creamy parsnip soup from who else, Melissa Clark, and instead of serving it with a boring loaf of bread (I don't mean that), I tried this recipe for rosemary almond meal bread from Sprouted Kitchen. It was quite tasty, and another nice gluten-free discovery.


Parsnip soup, pre-puree, and the rosemary loaf

What I watched: Stranger Things 2. We finished it on Halloween and I was totally on a high from it. I didn't think I could get into it again like I did the first season, but after the fourth episode I was back in its grip.

Other excitement:

I ordered this pin to have for the anniversary of Nov. 8, 2016.

I have been watching squirrels with great delight. They were everywhere last week and were working seriously hard. This one paused above us while Luna investigated the smells on the ground.

I've also been enjoying how loud the falling leaves were in the quiet morning hours. I took this photo around 5:30 a.m. on my walk with Luna - if you look closely you can see a couple on their descent.


I found it sweetly coincidental that I had car trouble while my car-loving brother was in town for work. After getting a new battery and new starter installed, I got to share a pizza dinner with both brothers on Wednesday night. After a very satisfying bag of popcorn at the mechanic's.


7.02.2017

Shredding dinner

Dinner doesn't always have to be a hot thing. The more cold dinners I can make this time of year, the better. I know I'm not alone in this quest, so I wanted to share a recent recipe that was extremely tasty, healthy and filling: coleslaw. Except it's not really coleslaw in the mayonnaise way. It's shredded cabbage and carrots, yes, but then it gets a Vietnamese treatment with a pound of shredded chicken, to boot. And a sprinkling of peanuts. It's a very attractive salad, actually, and I'm sure people would go nuts for it at potluck-type affairs.

In a house of two, this salad lasted a couple nights, and it can be easily zazzed up the second night with other veggies to add a little more bulk. Another bonus for those who need it: it's a gluten-free meal. The only time your kitchen will get hot is when you toast the sesame seeds and poach the chicken, though I'm sure a store-bought rotisserie bird or any leftover cooked chicken would be great, too. 

Note: The fish sauce really makes this dish wonderful in its classic umami way, but I would think soy sauce or Tamari might be OK, too, if you don't have, or like, fish sauce. I would use a little less at first (like 1.5 T.) and add more to taste before dressing the salad.


Vietnamese chicken and cabbage salad with peanuts
Adapted slightly from The Oregonian Cookbook

Chicken:
10 c. water
1 lb. boneless, skinless chicken breast

Dressing
3 T. fresh lime juice (about 2 limes)
2 T. plus 1 tsp. fish sauce
1 T. rice vinegar
1 T. vegetable or peanut oil
1 T. firmly packed brown sugar
2 small cloves garlic, minced
1/2 Thai or serrano chili, minced (with or without seeds, based on your spice preference)

Slaw:
1/2 large onion, thinly sliced in half moons
2 T. sesame seeds
1 small head green cabbage, shredded (about 4-5 c.)
1 carrot (or more), shredded (about 1/2 c.)
1/3 c. fresh mint
1/3 c. cilantro
1/4 c. parsley
1 T. unsalted dry-roasted peanuts, finely chopped

Make the chicken: In a medium saucepan, boil the water over high heat. Add the chicken and reduce heat to simmer. Cook for five minutes, then reduce the heat again slightly, so that the liquid bubbles every few seconds. Cook for 10 minutes. Remove from heat and let the chicken stand in the liquid for a few minutes. The chicken should now be cooked through. I check by separating the chicken with a fork. Remove the chicken and place on a plate or cutting board to cool completely. When cool, shred the chicken.

Make the dressing: Whisk ingredients together in a small bowl.

Make the slaw: Mix the sliced onion into the dressing to marinate for at least 10 minutes. Meanwhile toast the sesame seeds in a small skillet over medium-low heat, about 3 minutes, or until light golden brown. Transfer to bowl and set aside.

Combine the chicken, cabbage, carrots and fresh herbs in a large serving bowl. Dump the onions and the dressing in the bowl, too. Toss everything together well, then sprinkle with the toasted sesame seeds and peanuts. Serve immediately. 


5.09.2016

Whole30: Week 2

I didn't give up. That was the biggest win for me this past week. Other key highlights and takeaways:

1. There is so much sugar added to things. This becomes even more apparent when you're figuring out dinner at the last minute. My brilliant plan was for sausages and shrimp on the grill. Fast and assuredly delicious.  I specifically went to an actual butcher shop that grinds their own sausage because I thought surely these guys would only use natural ingredients. Only to be told, "Yeah, all of our sausages have sugar added," he said. "It's like the fourth ingredient on our list." UGH.  I headed to the grocery store to load up on shrimp and see their sausage selection. But again, all the sausages were sugared, and non pre-cooked shrimp was nowhere to be found. I was on Day 11 of this thing and was ready to quit right then and there as I stared at cases full of steaks, chicken and pork (which I'd had enough of). Wouldn't a simple spring pasta be nice, with bacon? (I ended up sending Joel out to eat on his own [pizza!] so I could suffer the consequences alone of trying a made-up concoction of chorizo, onions and tomatoes. It was actually pretty good.)
Chorizo concoction

2. From the Whole30 website: Fact: you are most likely to quit your Whole30 program on Day 10 or 11. By this point, the newness of the program has worn off. You’ve made it through most of the unpleasant physical milestones, but you’ve yet to experience any of the “magic” the program promises. You’re still struggling to establish your new routine (read: you’ve eaten eggs prepared ten different ways over the last ten days), and while you’ve been trying really hard to have a good attitude, today you are incredibly aware of all the foods you’re “choosing not to eat right now.”  Everywhere you look, you see the things you “can’t” have: the melted cheese on a greasy burger, the creaminess of that double-scoop cone, the cold beer in your best friend’s tailgate cooler. Dammit, this is hard! And right now you’re wondering if the results will really be as good as “they” all say it is.

You’re cranky, you’re impatient, and you’re really, really tempted to just eat the stupid cheese.

This is where you really start to experience the psychological hold that your food habits have on you. You’ve put in a lot of effort to get to where you are right now, but you’re still waiting for the results you’re hoping to see. Your  brain tells you that you deserve some kind of reward (don’t you?) and, of course, we’ve been conditioned to think of food as the best reward out there. Right now, you’re craving that ice cream, beer, or whatever treat you think would make for just the right reward. But, instead of that treat, you’re standing face to face with the realization that you have 20 more days of deprivation ahead of you.

Yes, that happened to me. 

3. I got to eat out! Central Food in Spokane is a beautiful bike ride away from our house, and it also happens to have a completely compliant Tuna Nicoise Salad. It was so good to be out and about. After dinner, I even agreed to head across the street to Brain Freeze, where I would fill my nostrils with the smell of waffle cones, resist the ice cream and enjoy a simple espresso. 
View from the restaurant
4. My mom got me onto a really good alternative to eggs/meat for breakfast. It's a nut porridge made with cashews, almonds and walnuts, along with coconut, coconut milk, banana and sauteed apples with spices. A little goes a long way and it's all the flavors I love.

5. My pants are looser. I know you're not supposed to weigh yourself during the 30 days but I did. At the moment I've dropped five pounds.

6. Less food prep, more leftovers, lesson learned. After all that food-prepping the weekend before, I ended up tossing some meat by the end of the week because I couldn't stand the sight of it. I'm finding that I much prefer making more food at dinner and ensuring that I have some for lunch the next day. That way chicken doesn't get as gray (yuck), the solidified fat on pulled pork doesn't cast as much of an unsavory glow, and each day can be a new lunch. 

7. Toasted coconut flakes is the new popcorn. I eat a little dish of the big flakes, sprinkled with a little Kosher salt, each night as a little treat with my tea.
Coconut flakes with sauteed apples - deluxe!

8. Okay, okay, this is worth continuing. I really do feel good. I have good energy, I have a better handle on my mood, my face is smooth and clear, and I'm sleeping well. 

The adventure continues.