Showing posts with label Mains. Show all posts

8.08.2019

From the summer kitchen

With the deck project having taken away crucial barbecuing space this summer, and with the milder temperatures not preventing me from turning on the oven, it's been a slightly different kind of summer table spread. Here are the things I remembered to document:

For breakfast...


Dutch babies. I experimented with a couple different recipes, including a gluten-free variety, to get the perfect baby for all. These were a special request for Joel's dad's birthday breakfast.  Pictured here was the first try, and my favorite basic recipe from a 1974 Scandinavian cookbook from Sunset magazine (thanks, Mom!), baked in a cake pan. It has a little lemon zest and cardamom in the batter, which is simply nice. I mean, it's really hard to screw these up. But they always feel special.


Buttermilk sandwich bread...which I used for croque madames...in honor of the final stage of the Tour de France, which as I might have mentioned before, I won. 


Blueberry scones. Made on a slightly hungover Sunday morning after a night out with my gal pals, who sent me home on my bike with a pint of freshly picked blueberries in my pannier. I used a recipe for whole-wheat buttermilk scones that called for raisins, which I subbed with the berries. The scones were a tad dry (whole wheat flour AND oatmeal) so the berries added a nice burst of juice and flavor.


Baked banana buttermilk donuts. My local kitchen supply store had a sale during the 4th of July on all products that were made in the U.S.A., which included a donut pan I've lusted after for years, so I took it as a sign and bought it. Thanks, America. Because I had buttermilk and overripe bananas, I looked online to see how to combine it into donuts. We topped these with Nutella. It tasted more like a muffin. But donut shaped.

(If you can't tell, I seem to have a lot of buttermilk to deal with.)

For dinner:


Roasted dill salmon. Dill doesn't often get its day in our house, but I had a real craving for it and this recipe from the New York Times was quick and delicious. You simply make a marinade of 1/4 c. lime juice, 2 T. olive oil, 2 T. soy sauce, 2 T. maple syrup, 3 T. chopped fresh dill, 1/4 tsp. turmeric and a pinch of saffron (if you have it - I didn't), and a crushed garlic clove. Place salmon fillets skin side down on a lined rimmed baking sheet (smaller is better), season with salt and pepper, and pour the marinade over and let it sit for about 15 minutes as the oven heats to 425. Then transfer it to the oven for about 10 minutes and serve with rice or whatever. 


Sesame soba noodle salad with roasted mushrooms and tofu. It's probably one of my favorite meals and I don't make it often enough. It's so savory, crunchy (that's cucumber in there...not avocado) and satisfying and I'm always glad to have leftovers for lunch. The recipe comes from Melissa Clark's Cook This Now...like so many recipes I post on this blog.


Soupe au pistou. I held onto this recipe from my Milk Street mag a couple months back for pesto season. It's weird because you'd think the last thing you'd want to make in summer is soup, but this celebrates all its flavors and it was so, so good. Fresh tomatoes, green beans, carrots, beans, garlic and small pasta go into the soup, and the pesto is added as a garnish. It's nice to have a partner who works from home and can prep this on a weekday afternoon and tend to it as needed (cooked from dried beans), otherwise this would have definitely been a weekend meal. 


Chicken Milanese with tomato, mozzarella and basil salad. Because after a long day, it feels good to take a meat pounder to some chicken cutlets. The basil dressing that goes with this is divine. Another gift from Melissa Clark via the New York Times.

Chicken tinga tacos. This is something Joel makes and it's one of my forever favorites. I don't care about other recipes for chicken tacos or burritos anymore. I contribute the pickled onions and a side of Rancho Gordo beans. 

For dessert:


Smoked paprika peanut butter cookies. I got the recipe from David Lebovitz's blog and was totally starstruck (in the nerdiest of ways) when he shared my post on Instagram and used it as an opportunity to link to the recipe again. To be honest, I was expecting more smoke, but ultimately these were just strangely colored but very delicious, chewy peanut butter cookies. 


S'mores blondies. If these aren't viral on the internet yet, they will be. Gooey as all get-out. I took to calling them power bars. 

6.01.2019

The Stew

I am extremely conscious about the ways we elevate things only to ruin them. Millennials - my generation - are great at this, mostly because we have the internet to heighten and accelerate the process - though I think every generation is drawn to this phenomenon. And once we've ruined things, we look for other things that were ruined or viewed as uncool or unhealthy by a previous generation (e.g., mayo, MSG, Bob Ross) and give them new life.

As a result, I greet every new trend with an appreciation for Newton's Law. When I hear about something that everyone love-love-loves, I anticipate backlash and keep my distance as long as possible. You may view this as a negative way to view the world, a sad form of self preservation, or just a symptom of the times we live in. I do, too, but I'm fine with it. And yet, in trying so hard to avoid trends, I'm finding that I'm not immune to the sway of the pendulum. I want know what everyone is raving about and why. I just may be a late adopter.

So what bandwagon did I most recently, finally, jump on? I made Alison Roman's #TheStew, a spiced chickpea stew with coconut and turmeric. Roman is a big deal among millennials right now because  home cooking is a big deal (a result of our budgets), and in true millennial fashion, we hashtag it like everyone knows about it, because why waste time explaining when there's the internet? And we exalt Alison Roman not only because recipe developers are finally getting their due, but because it's not enough to just like the food - you can't have a good cult-like following without a leader (see also: Samin Nosrat). She invented the ever-popular chocolate chunk shortbread cookies (a.k.a. #TheCookie), which I made, of course, and loved. And thus we decided everything she gave us is gold. It's very possible that Alison Roman's next career move is to have a Netflix show.

But back to the food: In the case of #thestew, I knew based on ingredients alone that I would like it but wanted to guard any enthusiasm I might have by trying to find something that could have been improved. I did reduce the amount of coconut milk a tad (two cans is a lot - not just from a richness standpoint but for the liquid element of it), and I put the chickpeas you're supposed to reserve for garnish back in the stew at the end because I didn't want cold chickpeas on my stew and there's no point in trying to make this dish pretty.

It was a delicious meal - a hearty, affordable, meatless stew that is worth some hype, regardless of trendiness. Even if Alison Roman eventually (sadly) becomes part of a trend we eventually move on from, or if we discover that chickpeas cause cancer and climate change, this is a recipe worth trying now, while it's hot. I don't think it's any better than other delicious meals you might cook at home - I think it's just surprising to a lot of people how filling and satisfying chickpeas are, and with coconut milk and vitamin-packed greens, how diet-conforming this meal is. Call your vegan coworkers, your gluten-free pals, your lactose-intolerant relatives and have a freaking dinner party again. Because dinner parties are trending (because, you know, home cooking) and you better have something ready. Just don't forget the hashtag when you post about it.


5.29.2019

Mark Bittman's Chicken Adobo


Are you noticing how much food documentation is going on here? It's so exciting to make dinner and eat while it's still light outside. It makes food presentation that much more appetizing, and easy to photograph, even with an old iPhone.

I'm also excited about the recipes I've been trying lately. Between my New York Times cooking subscription, my Milk Street magazine, and Mark Bittman's weekly newsletter, I'm trying all sorts of new things and they've been real winners.

In addition to that, we've been getting meat from Butcher Box delivered every other month or so with its array of frozen, sustainable meats. We get the custom box so we choose between various cuts of chicken, pork and beef, and can add in salmon and other stuff. It helps us plan ahead since we have to think about thaw time, and what the heck we want to do with it when it thaws.

Mark Bittman enticed me with his recipe for chicken adobo just before Memorial Day as the perfect treatment for some bone-in, skin-on chicken thighs and a grill, noting that this is one of his most highly requested and beloved recipes. It's so easy and you can make the first part in advance. And the ingredients are so basic that if you have the chicken, you probably don't need to go to the store, unless you don't have coconut milk and you really want it in the sauce (which is not required).

Have I signed you up, too?

I highly recommend the newsletter, but here's a link to the recipe. I changed nothing other than to use just thighs rather than a whole chicken, and I did use leftover coconut milk I had open in the fridge, but it wasn't the whole amount called for. And I ended up using the broiler rather than the grill to crisp up the finished product because for just the two of us, it made more sense.

Regardless, this chicken was absolutely delicious. I served it with a lemony cabbage and cucumber and mint slaw (ingredients leftover from that thai dish the other night) which was a nice, fresh pairing.

5.27.2019

Ali Slagle's Southern Thai-Style Red Curry

When I mentioned this recipe to Joel, he was quick to ask me to clarify whether this was some Rachael-Ray-esque fusion of cuisines, i.e., the American South meets Bangkok. Chicken curry on shrimp grits, perhaps? Interesting thought, but, thank God, no.

I love recipes like these. One skillet, easy seasoning, big flavor. Easy to do when I get home at 6 p.m. Enough for lunch leftovers the next day. I also love the salad-like toppings you can add: cucumbers, cabbage, carrots (the pre-shredded mixes are my friend), herbs. It's a complete meal.


Southern Thai-Style Red Curry
adapted from Ali Slagle via The New York Times

2 T. neutral oil (I used avocado oil)
1/4 c. red curry paste (I used Thai Kitchen)
1 tsp. ground turmeric
1 jalapeno, thinly sliced, seeded if needed (or other hot chilis)
1 pound ground chicken
1/2 tsp. dark brown sugar
2 tsp. fish sauce
1/4 tsp. lime zest
Optional accompaniments: Rice, shredded carrots/cabbage, sliced cucumber, fried egg, mint, cilantro

Warm the oil in a large skillet over medium. Add the turmeric, curry paste and jalapeno until toasted and fragrant, about 3 minutes.

Add the chicken and cook, breaking up with a spoon. Stir to coat the chicken with the curry mixture, cooking until the chicken is cooked through, about 7 minutes.

Stir in the brown sugar, fish sauce and lime zest until it's mixed well.

Serve on rice with desired toppings.


5.21.2019

Shaved asparagus pizza

Red sauce will always have its place, but I'm discovering how much I love sauceless pizza. Spring veggies with their delicate flavors would be overpowered otherwise.

Here's my take on Smitten Kitchen's Shaved Asparagus Pizza. Per her suggestion, I added red pepper flakes and topped it with egg, but since I also had some leftover roast potatoes, I added those, too. Marvelous.

Shaved Asparagus Pizza

One half-pound of prepared pizza dough (or enough for one pizza size of your choice)
1/2 pound fresh asparagus
Leftover seasoned roasted potatoes, sliced into smaller pieces if large
1 ball fresh mozzarella
1/4 c. freshly grated Parmesan
Olive oil
Salt and pepper
Red pepper flakes
Egg
1 scallion, white and light green parts thinly sliced

1. With a pizza stone placed on the lower oven rack, heat the oven to 500+ degrees.

2. Wash the asparagus. Holding onto the base of the spear, use a vegetable peeler to peel long strands. It helps to do this against a cutting board. The peeler blade may get clogged sometimes, but the point is to pile asparagus shavings and bits on the pizza, so don't worry about it as long as you've got thin slices. Toss the peels in a large bowl with olive oil, salt and pepper. Discard the woody ends of the asparagus. 

3. Spread out the pizza dough to your desired thickness using whatever method you like (press into a pan, or roll it out and place on a peel, etc. - I have a whole explanation of my methods here).

4. Top dough with Parmesan, then dot with mozzarella (I like to tear it into small chunks and place them a couple inches apart on the pizza). Scatter the roast potato, then pile on the asparagus. Sprinkle with red pepper flakes (to taste). Slide into the oven and bake for 10 minutes.

5. Around the 5 minute mark, heat up a small frying pan with a little oil. When hot, add an egg and fry, being careful not to let the yolk overcook. Ideally, the egg should still be cooking when you take out the pizza. A poached egg would also be a nice option. Alternatively, you could crack the egg(s) directly on the pizza around the same time and let it cook in the oven. I haven't worked up the nerve to do this.

6. Take out the pizza. The asparagus should be slightly browned/charred around the edges. Top with sliced scallions and fried egg. Break the yolk a little and spread it a bit over the middle of the pizza so each piece gets an eggy bite. Slice and enjoy. 


1.12.2019

Grilling in January: Bon Appetit's Fried Salsa Verde

My memory for year-over-year weather is pretty unreliable, but I feel safe in saying, based on photographic evidence and internet consultation, that this winter has been a mild one in Spokane. Joel's been on a couple bike rides, we haven't had to keep a faucet dripping overnight, and I've seen icicles just once.

On Friday, I even cooked outside. I cleaned off the grill's summer residue and threw a couple of steaks over the fire. I've always thought that grilling is for all seasons, but it hasn't been until this year, when I have an honest-to-goodness grill, and a clear pathway to it, that I've been able to put that thinking into practice. 

The impetus was a recipe I found while deleting photos from my phone. At some point I screenshotted a recipe for a fried salsa verde, and miraculously it was something that still sounded good to me many months later. Even though I hate the thought of frying anything. (I don't care about the method, it's the cleanup that scares me away.)

It was a recipe in which a couple stars aligned: fresh herbs were 50 percent off at Rosauers, and I had everything else but steak (which was cheap) to make this fancy-tasting meal, including some
red potatoes that would be perfect alongside. 

If you've read the last post as well, you'll notice that 2019 is turning out to be a magnificent year for sage.

I promise the salsa verde's there. #candlelitphotoprobs


Fried Salsa Verde
adapted from Bon Appetit

1 c. sage leaves
1/2 c. rosemary leaves
vegetable oil, for frying
Kosher salt

Pour about an inch or two worth of oil in a small saucepan, and heat over medium heat. Test one sage leaf - it should sizzle when you drop it in. When hot enough, drop the remaining sage leaves and fry 15-20 seconds, until the sizzling subsides. Remove with a slotted spoon and place leaves on a paper-towel lined plate. Season with salt. 

Add the rosemary leaves to the hot oil and repeat the process, removing them to a paper-towel lined plate as well and season with more salt.

In a separate bowl, combine...
1/2 c. finely chopped parsley
1 garlic clove, finely grated (I use a Microplane)
2 tsp. red wine vinegar
1/4 c. olive oil
Several grinds black pepper

Crush the fried herbs with your hands (I find this to be easiest - otherwise you could use a mortar and pestal, or try with a spoon and some elbow grease) and blend in with the parsley mixture. Season with salt if needed. Let mixture sit at least 15 minutes and up to 6 hours. 

Serve with steak, potatoes, even a citrus salad. Or eggs. Put it on a sandwich. This stuff is really so good and the texture of the fried herbs is best the day it's made. But I used leftovers the next day and it still tasted excellent.

1.11.2018

Everything I know about making pizza

I make pizza at least every other week, if not weekly. If I don't know what to make for dinner, it often ends up being pizza. It's always satisfying, pairs perfectly with a salad and glass of wine, and in my opinion, it's fairly healthy because you get to control the ingredients. And despite how often we eat it, it somehow still feels like a special treat. I was thinking about this while making pizza the other day because for many people, making pizza at home feels like an undertaking. I'm here to tell you it's not!  Like a lot of things in life, you just have to decide you want to do it - then do it a few times and realize it's not that hard.

If you want more pizza and less stress in your life, then this is a guide for you. I hope it helps you realize that you can make delicious pizza from scratch in as little as an hour.

And yes, this post is long, but only because I've gone into great detail, not because it's complicated.

Flour, water, yeast and salt

Set yourself up for success, i.e., have these things on hand at all times 

Whenever I go shopping, I make sure to pick up these things if I don't already have them:
  • Canned diced tomatoes: these can be fire-roasted, fancy gourmet, no salt added, etc., but I do try to avoid any that include green chili peppers or anything other than garlic or basil. 
  • Mozzarella cheese: buy it in a ball. It can be the cheap, shrink-wrapped low-moisture kind (Frigo, Kraft, etc.), but I highly recommend stocking up on the fresh mozzarella (also shrink-wrapped) from Trader Joe's. It's cheap and it lasts a week or two in your fridge unopened. Don't worry about the moisture - we'll address that later. But whatever you do, don't buy pre-shredded cheese. If it's all you have, then use it, but if given the choice, make the best one and buy your cheese whole. 
  • Canned olives or other things that come in cans or jars (like anchovies, peppers, artichoke hearts) that keep a long time and you enjoy on pizza
  • Salty meat, if you like it: Cured meats last a good while in your fridge so they're good to purchase for your future pizzas. My favorite is Stockmeyer Prosciutto (also found at Trader Joe's), and again, if left unopened in the fridge it's good for a while. Bacon is also always great on pizza, and many people have that in their fridge already. Or of course, packaged salami (pre-sliced makes it easier) or ham works, too. Here's a tip: go to your deli counter and get 4-5 slices of whatever salami or sausage product looks good. You end up spending about a buck, and you can cut the salami into smaller bits and it's plenty for one pizza. 
  • A variety of vegetables. You should be eating more vegetables anyway, and if you're finding you're not eating them, then make a darn pizza. Onions are a staple for me, and if you have nothing else you'll still have a great pizza. Mushrooms are important to me, too. But it's fun to experiment with a few wild cards, like thinly sliced Brussels spouts, broccoli, kale, scallions, etc.
  • Flour and yeast. Because you can't make dough without them.
Broccoli and pancetta with cream sauce

Equipment
  • A cutting board (to knead dough on, prep toppings, and to cut pizza)
  • Parchment paper
  • A rimless baking sheet or pizza peel
  • A baking stone
  • Rolling pin - experts can get by without one, but we're not experts yet
  • Fine mesh strainer
  • An oven (any ol' electric oven will do - you do NOT need to remodel your kitchen to put in a wood-burning pizza oven. Go out for that kind of pizza.)
  • A bowl and something to cover it, preferably plastic wrap or a large plate
  • Long, sharp chef's knife or some other thing to cut pizza with (I just got one of these for Christmas and it's wonderful). I'm not a huge fan of rolling pizza cutters because it often drags the toppings around, but if you have one, use it!
  • Optional: standing mixer with dough hook
  • Optional: cooling rack

How far to plan in advance

This seems to be the hurdle for a lot of people. You don't need all day - but I would plan for at least an hour from start to finish if you're making dough (10 minutes to make the dough, 30 minutes to let dough rest and prep toppings, 10 minutes to bake, a few minutes to relax). That said, dough made a day or two in advance will taste phenomenal and save you time. Dough made 30 minutes ago will still taste good so don't let time be a barrier! If you absolutely don't have time to make dough, or just don't like making it, then find out which of your local pizzerias sell dough balls. I used to get them from Bennidito's before I got over my mental dough hurdle. Trader Joe's has dough, too. 

Dough

There are a couple different methods I use to make dough, and both work beautifully. 

1. Artisan Bread in 5 Minutes a Day: I started using this no-knead method for pretty much all of my bread products a few years ago, and because of that I often have dough in the fridge ready to be used for pizza or whatever else. Here are the dough instructions from the geniuses who came up with it. You just need a large enough vessel to keep the dough in your fridge, and when you're ready to make pizza, just flour your hands and pull off a grapefruit sized ball for a single pizza, round it into a ball, place it on a lightly floured board and cover with a bowl for about an hour (assuming it's been refrigerated. You can also make the dough the same day, take the dough you need when you're ready, at least a couple hours later, and stick the rest in the fridge and start making your pizza). This dough is the tastiest and has the most satisfying chewy texture of any pizza dough I've used at home. Beautiful air bubbles, crusty edges - it's never failed me, even when I doubt my skills. Another note on starting with cold dough: My kitchen is cold and drafty, so I tend to set my oven to warm for 5 minutes, turn it off, place the dough in an oiled bowl, cover with plastic wrap and place in the warmed oven for 15 minutes to give it a head start.

2. Day-of dough. Because sometimes I don't always have dough in the fridge, and my idea for pizza comes to me as I drive home from work, Deb Perelman's recipe for Rushed Pizza Dough is my standby. I often use the dough hook in my standing mixer to knead the dough, but because it's such a small amount of dough, it's actually a little easier to knead it by hand. Use this recipe, but when you're ready to let it rise, decrease the waiting time by warming your oven for 5 minutes (use the Warm setting, i.e. 170-200 degrees F), turn it off, place the dough in an oiled bowl and cover with plastic wrap and place it in the oven for 30 minutes (similar to above). This dough tastes more like a bland cracker compared to the other dough, but as a vehicle for delicious toppings, it still satisfies.
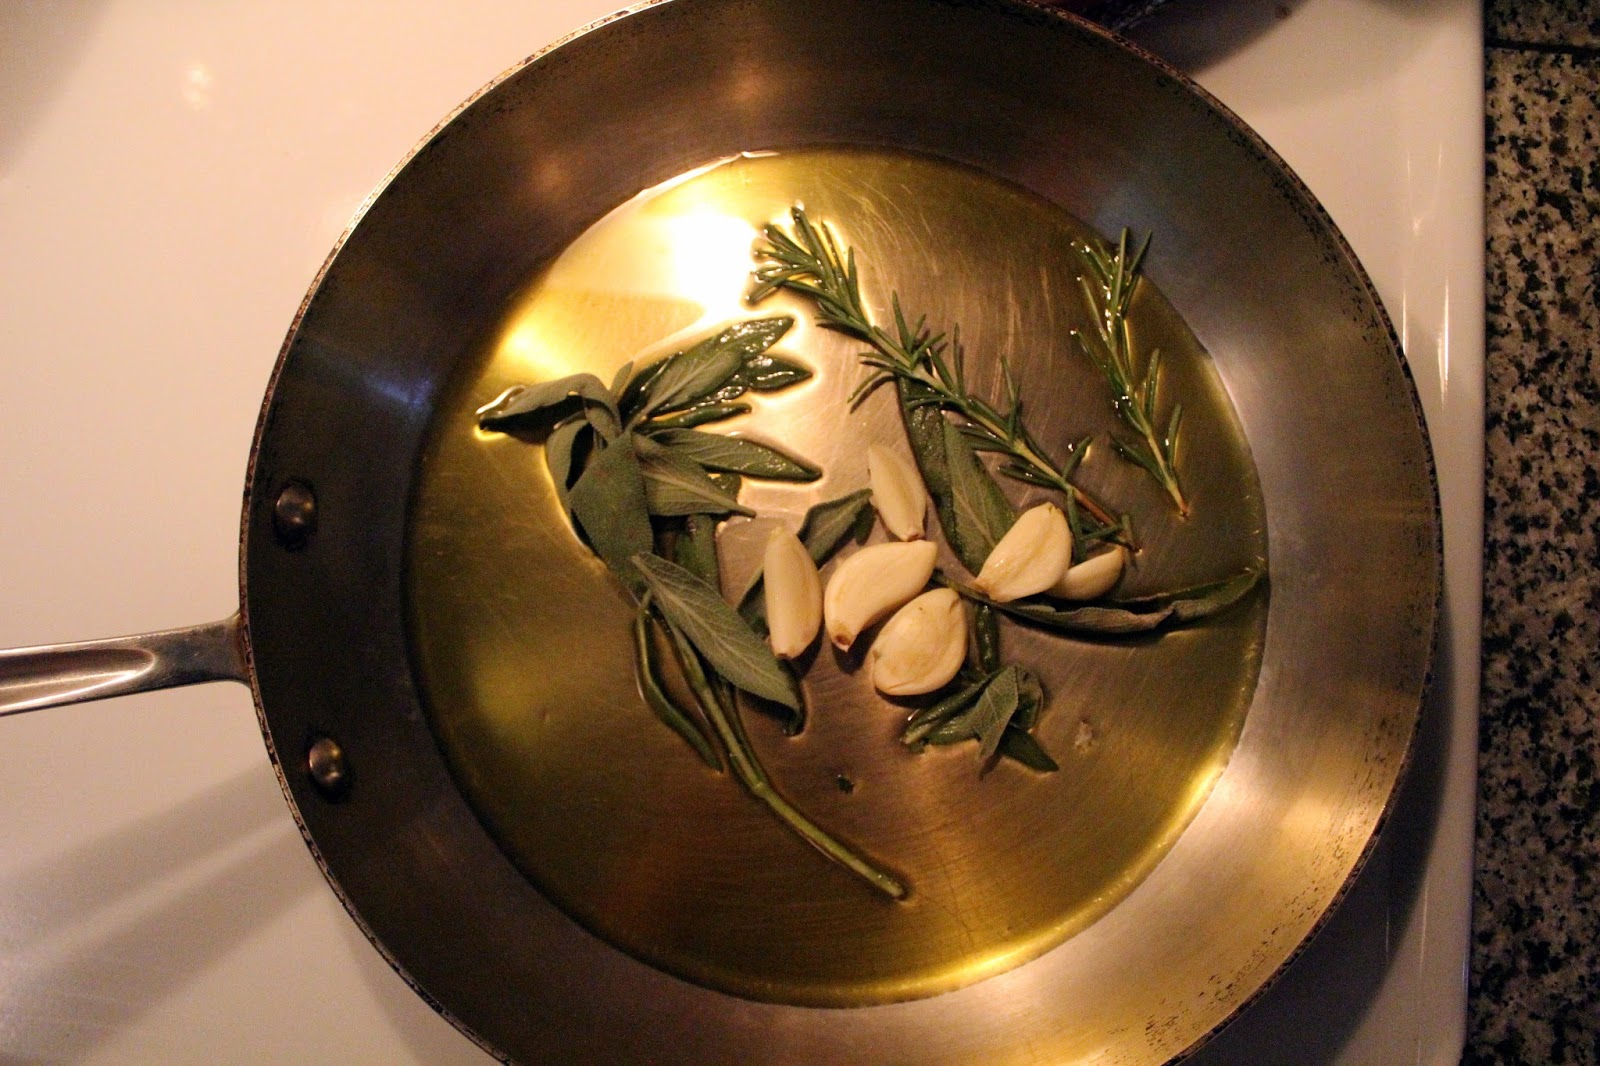
Prep station

Prepare for pizza

I always bake my pizza on a baking stone. You can use a sheet pan or whatever, but I never do that so my instructions are for using the stone.

At this point, you have risen or mostly risen dough at room temperature, resting somewhere on a lightly floured cutting board or in a bowl.

Next, put the baking stone in the oven on a middle or lower rack and crank the heat to 515-525 degrees F.

Get your rimless sheet pan or pizza peel and place a layer of parchment paper to cover it and set aside.

When the oven has told you it's preheated, it's probably still not quite there, so I don't even begin the next steps until the preheating beep has beeped - that way I always give it a few extra minutes to get good and hot while I assemble the pizza.

On top of the pizza, mis en place

The biggest revelation I've had about pizza toppings is that less is more. Take-and-bake pizza chains led me to believe I needed to completely cover my pizzas with sauce, gobs of cheese and a million toppings, perfectly layered and arranged all around the pizza. When you make pizza at home, this just creates soggy, gross pizza. A modest ladle of sauce, spaced out blobs of cheese, and sprinkles of everything else creates a delicious pizza that allows you to appreciate everything you placed on it once it's cooked.

1. Sauce: RED: Making my own tomato sauce is so easy and so much better than canned or jarred tomato sauce. It's bright and fresh and tomato-y, and you don't need to cook it before slathering it on the pizza. You just need those canned diced tomatoes I mentioned above. (I've used whole, stewed and crushed as well and all work just fine.) One piece of equipment that is helpful in making the sauce is either a mini food chopper or blender or food processor or food mill. Open the can and drain the tomatoes using your mesh strainer. To the drained tomatoes, add either a small clove of garlic or a few shakes of garlic powder, a healthy pinch of salt and another pinch of red pepper flakes. Blend together with whatever machinery you have. Put the blended tomatoes back in the fine mesh strainer and let it drain for a few minutes while you prep the other ingredients (this helps prevent soggy pizza if the tomatoes are especially juicy). After it's drained, taste the sauce. Sometimes I need to add a dash of vinegar for a little more acid, or sugar, but that's rare. Season to your taste and place the sauce in a small bowl. Note: you won't use the whole amount on one pizza.

2. Sauce: WHITE: If you have milk, flour, butter and garlic powder, you can make a quick white sauce. Melt a couple tablespoons of butter in a small saucepan over medium heat. Whisk in a tablespoon of flour until smooth. Add a 1/2 c. of (ideally) whole milk, a splash at a time, whisking smooth after each addition. Add salt and garlic powder to taste (you can always use fresh garlic, too), whisking until the mixture is thick enough to coat a spoon, just a couple minutes. Set aside until you're ready to assemble.

3. Cheese: Pull and tear your mozzarella rather than shred, or use the largest holes of your cheese grater. If you're using fresh cheese, get your hands a little dirty and tear the cheese into inch-or-two pieces. If it feels especially wet, it doesn't hurt to dab it with a towel to remove excess moisture. If you like adding other kinds of soft cheese here, like goat or ricotta, go for it. Or experiment with stronger cheese like aged provolone (divine if you can find it) or fontina or a combination. You'll want to shred or grate those and layer them sparingly.

4. Meat: I don't like biting into large rounds or strips of meat, so I cut it into bite-sized pieces. This way I end up using less, too, because I can sprinkle it more evenly across the pizza. In the case of bacon, I chop it, cook it, and drain it before adding to the pizza. This option is better if you have a bit more time, of course.

5. Vegetables: For the most part, you can just slice, dice, and chop your vegetables and let them cook with the pizza in the oven. When I have more time, however, I enjoy caramelizing the onions.

6. Everything else: Sliced olives, etc. should be at the ready, too.

7. Fresh herbs: I sometimes add fresh thyme or minced rosemary to the toppings, but always add basil after the pizza comes out of the oven, otherwise you won't taste it.
No cheese? No problem. Just make focaccia. Potato and rosemary with flaky sea salt.

Roll it, bake it, mark it with a P

I roll out the rested dough on that floured cutting board, and sometimes I stretch it a little by hand. Generally, I end up with a 12-14" thin crust round. Sometimes I almost break through the dough - if that happens, just pinch it back together. Then carefully lift it and place it on your parchment-lined sheet or peel, reshaping it if needed on the paper. I keep the sheet nearby so I don't have to carry the fragile dough across the room.

Spread the sauce. As I mentioned, you really don't need to coat the pizza with it. Use less than you think you need. It will all kind of blend together through the magic of baking.

Add most of the cheese. I use about half of one small mozzarella ball (the TJ's one). Again, use less than you think you need. I add a little bit more cheese to cover any blatant holes after I've added the rest of the toppings.

Add your other toppings however you'd like, being a little stingy but making sure that any slice will have all the ingredients you want on it in the end.

Feeling fancy? Add a tiny drizzle of olive oil, add any extra cheese you deem necessary.

This is the part that might make you nervous: sliding the pizza in the oven. One of the benefits of not putting a gazillion toppings on a pizza is that it remains somewhat light and fewer things are at risk of hurdling over the top of the pizza when you swiftly slide it on the pizza stone. A couple tricks I've learned:

1. Cut the parchment paper to fit the finished pizza with an inch overhang. This allows it to slide freely but also prevents the paper from charring as it bakes.

2. Position the pizza where you want it to ultimately end up on the pizza stone - don't try to make it fly. This means putting the end of the sheet at the back of the peel, angling it down slightly (careful not to burn yourself on the element above) and then gently jerking back on the sheet as the pizza slides off with the parchment paper. The parchment paper is your best friend in this step. I've tried it without, using cornmeal or flour on the bottom, and have failed and/or ended up with a weirdly shaped pizza.

Bake it for 10 minutes. It always takes 10 minutes. If it doesn't, you might want to get your oven checked out.
Prosciutto and basil

Final moments before eating pizza

While the pizza bakes and cools, I usually have enough time to do the dishes and assemble a quick salad. If nothing else, clear/scrape off your cutting board and make way for cutting the pizza and get your knife ready. And hang onto your pizza peel or baking sheet because you'll need that again to get the pizza out of the oven.

If you're adding fresh basil, or my favorite, arugula (lightly dressed with olive oil, lemon and Parmesan), get that ready to go, too. I sometimes get a small mound of Parmesan ready to sprinkle on the pizza right after it comes out of the oven.

When the pizza is ready, put on an oven mitt, then take your sheet or peel and carefully slide it under the pizza (with or without parchment). The parchment is sometimes strong enough to help you pull the pizza onto the sheet. Place it on the cooling rack (or leave on the peel/sheet) to cool for a couple minutes as you ooh and aah and set the table. Place anything fresh on top after these two minutes have passed. Then slide the pizza from the cooling rack to the cutting board and slice away.
Leek and bacon

A note about moisture and soggy crust

My guide includes steps to reduce the amount of moisture on a pizza, but sometimes, depending on toppings, there may still be small pools of liquid on top. If possible, I dab with a paper towel after the pizza has cooled a couple minutes to help absorb it and prevent that thin, crispy crust from turning to mush. For added insurance against soggy crust, once I cut the pizza I separate the slices to keep them from sitting in a soggy center.

Mistakes make great cooks

Ultimately, this post is built on mistakes I've learned from. There are many great ways to make pizza, but my biggest advice is to find a recipe - for pizza or something else you love - and make it enough times that it you know it all by heart. Memorizing a process opens you up to trying all sorts of variations on the theme. And suddenly you're that person who's pretty good at something, at least enough to write a blog post about it.


1.27.2016

Recipe test: Mama Leone's Chicken Soup

I feel like everything I post in January is about coping with January. It's either convincing myself that it's a great month, or that it's in my power to make it a great month, or that it could be worse. The truth is: January is the single hardest month for me all year. What a mood for a fresh start! New years should start at the cusp of a season that promises sunshine and growth, not in the heart of one of the coldest, darkest months. I hope everyone in the southern hemisphere fully appreciates this difference. Because if there were a month I could afford to escape from - put my work on hold, get someone to live in my house, and fly south - it is most definitely this one. Snowbirds, I salute you.

In another few days, I'll have survived another January and I can spend the month of February making amends for the various things I lost control of (temper, laundry, spending habits). By the time spring rolls around, I hope to be a decent human being again, with new insight on how to live this portion of the year. I am truly grateful that the last week has brought warm temperatures to melt most of the grimy snow and has also offered a bit of sunshine, including one of the most gorgeous orangey pink sunsets that usually only come this time of year (I know because I usually manage to snap a picture of it. In this case I was on the bus and my phone was somewhere at the bottom of my bag).

In the meantime, we're trudging along. I have a long list of books I'd like to read this year, and I've been reading as though I just discovered an amazing new hobby. I've breezed through three different books so far this year and am ready to get through another two quickies, perhaps over the weekend.


I have been buying us flowers each week. When we were in Mexico over Christmas, I bought a most intriguing bud vase that I'm enjoying filling each week with a new bloom. And using all my other small bottles and vases for the rest of the bouquet, spreading it around the living room.

And last week we loved eating this recipe for a chicken soup that features tomatoes and heavy cream, with chicken, tarragon, paprika and spinach as other delights. It came from my Oregonian Cookbook that I bought as reading material for the road during a too-brief stop in Hood River last summer. Since then I've cooked so many great things from it, a number of them having become instant favorites for us. This is one of them.


I love that it's first and foremost a creamy tomato soup with some chicken thrown in. But we did find that we preferred a little more chicken, so next time I make it, I'll use a whole pound instead of the recommended 8 oz. I also increased the amount of tomato because we often have some leftover canned tomatoes in the fridge after making pasta sauces and whatnot. It didn't seem to throw off the balance. Both of these changes are reflected in the recipe below.

Recipe grade: A+ !!

Mama Leone's Chicken Soup
adapted from The Oregonian Cookbook

1 lb. boneless, skinless chicken breast
Kosher salt and freshly ground black pepper
2 T. vegetable or grapeseed oil
3 T. butter
1 medium onion, diced
3 stalks celery, diced
1 T. minced garlic
1/2 tsp. dried tarragon
1/2 tsp. dried oregano
2 tsp. sweet paprika
1/2 c. plus 2 T. all-purpose flour
8 c. chicken broth
1 14.5-oz. can diced tomatoes in juice (I added a little extra tomato juice from a leftover can of whole tomatoes and recommend it if you happen to have it.)
3/4 c. whipping cream
2 c. thinly sliced fresh spinach

Preheat oven to 375. Line a baking sheet with foil. Season chicken with salt and pepper and place on the baking sheet. Bake 15-20 minutes, or until done. Remove from oven and cool. When cool enough to handle, dice the meat and set aside.

Meanwhile, heat the oil in a stockpot over medium heat. Add the butter and melt. Saute the onions and celery until the onions are translucent, about 6-7 minutes. Add the garlic, tarragon, oregano, paprika, 2 teaspoons salt, and 1/2 teaspoon pepper. Cook, stirring, for 3-4 minutes. Add the flour and stir until well-combined.

Slowly whisk in the chicken broth and bring to a boil. Add the tomatoes and cream. Reduce heat and simmer for 20 minutes. Add the reserved chicken and simmer 10 minutes more. Just before serving, stir in the spinach.

11.22.2015

Cooking through cookbooks

Over the last several months I've been falling back in love with Excel spreadsheets. I started one back in July to track all my spending, and I feel a little silly being so enamored by it, but it's the only thing that's worked for me after trying out every other free budgeting method (the envelope/cash-only system, Mint, etc.). Then last week, after surveying my living room and all the cookbooks spread out everywhere, undoubtedly after a desperate search to find something that sounded good for dinner, I started a new spreadsheet. It's called Recipe Adventure and it's going to be one of those never-completed, long-term projects for which I could easily lose steam. But at the moment, I'm charging through like a mad woman.

How I'm doing it: I'm going through my cookbooks page by page and indexing all the recipes I would like to try someday, categorizing them by estimated but realistic time (knowing that prep takes longer than a recipe normally specifies), course/occasion, general category (like casserole, stir-fry, cookie, pie) and the key ingredients that stand out - particularly those ingredients I would classify as "occasional" that I either have and need to use up, or don't have and would need to add to my standard grocery list. This is a representation of how I look through my cookbooks, always searching for what I can make with the time and/or ingredients I have, and what I can make with just a little more planning. And because it's such a simple Excel process, I can now sort based on any of these things without hauling out all my cookbooks. If the weekend's coming up and I want to try something a little more involved, I have a whole list of ideas. Or if Joel's making a main dish and I want to contribute a side dish, all the easier. I even have a sub-category called "desperation dessert" which is a sweet treat I can make in 30 minutes or less. These are important things.

Here are two recent recipes I tried. I am having a terrible time with food photography lately (I blame dark winter days and wanting to eat food while it's still hot), so suffice it to say these tasted much better than they look.


Meatballs in Tomato-Chipotle Sauce, from My Berlin Kitchen by Luisa Weiss. 

This was a nice way to use some leftover chipotle chiles in adobo and ground pork from a recipe earlier in the week. I also like that it doesn't call for white bread to bind the meatballs (because I rarely have that on hand) and instead uses zucchini to add moisture (I'm okay with buying a zucchini since I used up the whole thing here). Fresh tomatoes are used in the sauce, though if I make it again I'd probably use whole canned tomatoes since they have more flavor in these winter months. A solid weeknight meal that, for 2 people, made for nice leftovers as well. Recipe posted here.

Recipe grade: A


Teriyaki Stir-Fried Beef with Snow Peas and Mushrooms, adapted from The Science of Good Cooking by America's Test Kitchen (theirs calls for green beans and shitakes)

My complaint about ATK recipes is usually that they're slightly on the fussy side and use a million dishes, but their stir-fries (and almost everything else) turn out every time. And this is one of those recipes you really can make on a weeknight with a variable marinating time - as little as 30 minutes while you prep all the other ingredients. It was a little on the sweet side, but such is the case with teriyaki.  Recipe posted here.

Recipe grade: B+ (just because of the sweetness)


10.20.2015

Sick day

Here's a tip: whenever you're making soup from scratch, start by frying bacon. There's a common theme to my favorite soups: lots of vegetables, beans, greens, and salty bacon on top. Bacon provides the bookends to the whole process. When you start with bacon, you can saute everything else in its fat, and then garnish it with the bacon bits (unless you tend to snack on those bacon bits while you're cooking - I'm guilty of it).


Ham bone, greens and bean soup. I have made a million versions of this soup, sometimes with squash and/or potatoes, or with pasta instead of beans, but not often enough do I include a ham hock in addition to the bacon! It adds a richness, people. And when you're stuck at home with a cold, you need a lot of flavor to break through your flattened palate. And the cabbage says you're in it to win it. I declared this my favorite soup of fall 2015 as soon as I finished eating my first bowl of it, after I blew my nose for the hundredth time that evening. 

It's kind of sick to say, but sometimes I really enjoy these sick days. Yesterday I watched a little trash TV (it's called Antiques Road Show) and went through a box of old pictures (you thought I was going to say Kleenex? I got through about half of one of those, too). I took the dog out for a long walk while my head throbbed, feeling good about the fact that I could inhale with both nostrils. I used both the dishwasher and the microwave, two convenience appliances that are rarely put to good use around here. I got dressed at noon and went to Costco to buy dog food and oatmeal and got a primo parking spot. I came home and took a bath, finished a book, and microwaved this soup for dinner. I practiced a few sonatinas on the piano. I lit candles and poured an ounce of bourbon and watched the cat flip over her scratching pad.

And then I posted the recipe over here, if you're interested.  (The book from whence it came is one of my favorites. It's filled with inspiring but mostly simple recipes for all seasons.) Try it the next time you are left with a ham hock/bone, or feel like having a nice conversation with your local butcher. Cheers to a hearty spoonful.


7.29.2015

Community cookbook recipe test: Isabelle Jones' Zucchini Lasagne

I brought home a 4-pound zucchini that was abandoned by some gardener I work with (who knows who it was - people leave things they don't want on the break room table). I knew that I could get a few meals out of this thing, so rather than just bake a bazillion loaves of zucchini bread, as is my tradition, I checked out a P.E.O. cookbook for inspiration. I found it in a recipe for lasagne, which today might be billed as gluten-free, but for me, all that mattered was that it featured my cast-off squash as the star. Best of all, it was a recipe from a member of my home chapter, Chapter BN in Boise.

Long strips of zucchini replace the pasta noodles, which already gives it the simplicity of no-boil noodles. This recipe calls for a meat sauce that you cook down with wine for an hour and a half, and then there's gobs of cheese.


Lasagne is not a particularly inspirational dish. It's more of a hearty family meal, a meal you throw in the freezer for when unexpected company arrives, something that's hard to mess up and sure to please anyone who's not on a strict diet. And let's not forget it was the favorite of Garfield the cat. I've never had bad lasagne, but still, it's never been something I dream about or order off a menu; I certainly never think to make it for a casual dinner at home, let alone eat the day it's made, with sauce that didn't come out of a can. So now I will admit that this was a fun treat, and the zucchini made it fancy. No, it won't go into a regular rotation, but I will gladly add it to my "what the heck to do with all this zucchini" file.


Zucchini Lasagne
Recipe adapted from Isabelle Jones, found in Kitchen Treasures: A collection of recipes from Idaho's 50+ year P.E.O. members

4 large zucchini (or, in my case, half a big honkin' one)
2 T. olive oil
2 cloves garlic, minced
1/2 c. chopped onion
1/2 lb. ground beef or turkey (I used turkey)
1 15-oz. can diced tomatoes
1 6-oz. can tomato paste
1 4-oz. can sliced mushrooms (I used a big handful of fresh)
3/4 c. dry red wine
1 1/2 tsp. oregano
1/4 tsp. thyme
1/2 tsp. basil
salt and pepper to taste
8 oz. mozzarella, thinly sliced (I used part-skim)
8 oz. ricotta cheese (again, part-skim)
1/2. grated Parmesan cheese

Heat oil in skillet over medium heat. Add garlic, onion and ground meat. Cook until tender but not brown, stirring to keep meat crumbly (if using fresh mushrooms, add now). Add tomatoes, tomato paste, mushrooms (if using the canned variety), and spices and salt and pepper. Simmer uncovered for 1 1/2 hours.

Preheat the oven to 350. Oil a casserole dish (I used a 9x13 pan). Cut zucchini lengthwise into strips 1/4 inch thick and place half of them in the bottom of the dish to cover. Top with one half the mozzarella and one half the ricotta. Add half the meat sauce. Repeat the layering. Top with grated Parmesan cheese.

Bake for 30 minutes. Serves 4-6.

6.23.2015

Baked falafel: attempts at vegetarian-ish-ism

When some dear friends visited us from Petaluma - vegetarians, all - earlier in June, they presented us with a jackpot of Rancho Gordo beans. I was so thrilled to try these for myself after hearing so much about them. Between that gift and thinking only in terms of non-meat dinners that week, I felt myself get back into the veggie groove. Sometimes I forget how many flavors I have at my disposal when meat is out of the equation. To be honest, I would be perfectly happy eating a plate of beans, Rancho Gordo (which are, in fact, all they're chocked up to be) or otherwise, with a smattering of herbs for dinner, or fresh tomatoes and cheese on toast, but I also know someone else in this house might not find it substantial enough. A vegetarian dinner that both of us can enjoy definitely is not impossible, but right now it's mostly limited to pasta and soup. And hot soup loses its appeal when the temps are in the upper 90s (i.e., mid-80s in the house).

Aside from the ethical and health reasons I've believed as good ones for eating less meat, the thing I'm realizing as one of the best things of vegetarianism is the economy of it. A pound of dried beans is enough to feed a couple people for at least two nights with leftovers for a lunch or two.

Feeling inspired and well-equipped with bean varieties, I charged on in my quest to build my vegetarian-for-two repertoire. My latest inspiration came from a Mark Bittman recipe for baked falafel - something I'd only made for myself until now - which I presented with confidence to my dining companion. "Do I like tahini?" he asked. There was only one way to find out, I replied. To my delight, we both enjoyed this dish and the tahini sauce that accompanied it.

The link to the Bittman recipe is here, though I must note that I un-veganized his tahini sauce. When I whisked the tahini paste with the water, there was just too much separation and I had trouble emulsifying it without a spoonful or two of Greek yogurt. I also added lemon juice for flavor. You can use this sauce - my version - as a yummy vegetable dip or dressing on hearty romaine salads, too.

We made pita sandwiches with lettuce, tomatoes, and cucumbers. Are you as frustrated as I am by store-bought pita bread when it comes to actually using the pocket function?  The only time I got a pocket was when I made them myself (and I wasn't about to do that this time around). These were too gummy to wiggle a knife into without ripping, so we just split the whole thing in half and made a sandwich that way. Still good.

4.29.2015

A house with a name


This house is now our house. It's a very fine house. With one cat in the window (not visible), one dog on the front steps (visible). Built in 1909, part of the historic Booge's Second Addition (we just learned!) in Spokane, Washington.

On the day we closed, the thing I anticipated to be the most difficult - the part where I get a giant cashier's check from the bank - was, in fact, the easiest. No, the hardest thing about closing was signing my name with my middle initial. Boy, that really threw me. And signing my name while the closing agent was still talking was also difficult. Signing my name 15+ times is just plain difficult, no matter how you look at it. But, it happened. Everything is signed and the documents are presumably at the courthouse now, and we already have the keys, the same keys we've carried for seven years. But now we can change the locks, I guess.

It feels special, surreal, responsible, and weighty, like we've really invested in something, because we have, and not just in this little piece of property. Time will tell what this moment means for us.

***

Considering that cashier's check, it was fitting that it was on this evening that I made what Joel called a genuine hobo meal: franks and beans. We celebrated beforehand with bubbles, of course, but I had been craving baked beans for a good number of months. The beans were cooking on the counter all day and only needed to be doctored up with sweet and spicy ingredients. I started with a recipe from Melissa Clark for fake baked beans with crispy bacon, but substituted some links of grilled Aidell's chicken andouille sausage for the bacon. I also added smoked paprika, per the recommendation of the Wednesday Chef. I loved it, and even went so far as to say I'd eat this for breakfast.

We are storing up our energy for the months ahead, when those home shows I used to watch on PBS as a kid (Home Time, This Old House, etc.) gain new meaning, and friends with tools and trucks become our best. This will be fun.

Smoky Fake Baked Beans with Chicken Andouille Sausage

Original inspiration - Melissa Clark
Secondary Inspiration - Luisa Weiss

1 lb. pinto beans, soaked overnight and cooked all day in crock pot with:

  • 3 smashed garlic cloves
  • 1 tsp. salt
  • 2 dried bay leaves
  • 3 whole cloves
  • 1/2 yellow onion, kept in tact
  • enough water to cover by 1 inch
When the beans are tender (i.e., when you get home from work), transfer to a large pot on the stove. I removed a little bit of the liquid; it wasn't scientific, but there was still a lot of liquid, so I just took out a cup or two.

Heat the beans back to a simmer while you add...
  • 1/4 c. ketchup
  • 1/4 c. molasses
  • 3 T. apple cider vinegar
  • 1 1/2 tsp. Coleman's mustard powder (I just like their packaging; any variety will do)
  • 1/4 tsp. Tabasco, or to taste
  • 1 tsp. smoked paprika
  • Salt to taste (I added a couple teaspoons of Diamond Crystal kosher salt, if not more, which is less salty than other salts)
Simmer for 45 minutes or until it's to the thickness you enjoy and it is unbearably tasty. When you're about ready to serve, go grill those pre-cooked sausages and get them a little charred. We served up the beans in a shallow bowl and cut up the sausages into coins and mixed it all together, sliced some baguette and assembled a simple salad on the side. PERFECT. If you're the literary type, go read Steinbeck's Tortilla Flat and learn why eating beans is vital. 


6.08.2014

WEEKEND: 6.6.14

 When you're walking walking walking and suddenly you realize there are coconuts on the sidewalk.
This flower seems like it belongs in the "Golden Afternoon" scene from Alice in Wonderland, singing with its fellow blossoms.
We recently got hip to the fact that the ice cream shop in our neighborhood serves these Liege style waffles. They're special because they're made with caramelized pearl sugar and are crispy and pastry-like. No surprise: bananas and Nutella taste great on them. I got the version with Greek yogurt, honey, bananas and sliced almonds. We will be doing this again and again.
Confession: these herby and pasta photos were not taken this weekend. The photo above was just a pretty scene on the stove on some recent evening when Joel was flavoring the oil for an epic mushroom sauce. The photo below was from a different meal: pasta carbonara, which I would say fits in the top 10 dishes of my life. Joel picked up guanciale (bacon-like heaven) in Seattle last weekend with the express purpose of making this and other Roman pasta dreams. Seriously.

Okay, back to weekending. There is a woman in the neighborhood who has the most incredible garden with these looooong cone-like flowers I have never seen before. Have you?
 We introduced Luna to the Spokane River. She was like, "Eh."
This was more her speed.

I didn't do a very good job of documenting the momentous things, like our visit with family from Germany, and our trek to Elk Fest to see an old pal headline the Saturday night line-up. It was all grand and over too soon. 

1.09.2014

Slow-cooked pork sandwiches

Photo by Joel
Don't they look like little monsters?

Some people get really excited about pulled pork. I mostly get excited about how easy it is to make. There's just something about taking a few minutes in the morning to plop stuff in the crockpot and coming home to aromatic insanity. But yes, it also tastes good.

I've seen lots and lots of recipes for pulled pork, but this one is the easiest for me, and you can make a really great barbecue sauce with what's left in the pot.

Slow-cooked pork
Adapted slightly from King Arthur's Flour
3-4 lb. boneless pork shoulder (I personally prefer boneless to make things that much easier with clean-up, and it's sometimes less fatty)
kosher salt
1/3 c. brown sugar
1 small onion, peeled and sliced 1/2- to 1-inch thick
1/3 c. Worcestershire sauce
1/2 c. apple cider vinegar

Rub salt all over the pork, then pat on the brown sugar. Place the onions in the bottom of the crockpot. Place pork on top and drizzle the Worcestershire and vinegar over it. Cover and cook on high for four hours, then turn down to low for another 4 hours or so (or just cook it on low the whole time. I'm sure it will be fine).

If making a day in advance, refrigerate pork and cooking liquid separately (you can shred the pork whenever). If making the day of, remove the pork and place the cooking liquid in a container to cool at least 15 minutes in the fridge to help separate the fat.

BBQ sauce

Cooking liquid from pork (will have congealed if it sat in the fridge for awhile, but that's fine)
1/2 c. ketchup
1 tsp. liquid smoke
1 tsp. hot sauce (I use Tapatio)

If you haven't already, remove the top layer of fat from the cooking liquid, and bring to a boil in a heavy skillet. Turn down and simmer for 10 minutes.

Stir in the ketchup, liquid smoke and hot sauce and simmer for another 10 minutes, until it's reduced down and the spoon leaves a short trail in the pan.

Either place the pork in the pan with the sauce, or toss the sauce with the pork in a separate dish. Serve on your favorite vehicle (I love small hard sesame buns). Top with coleslaw, if you're that kind of pork-sandwich-eater.

8.28.2013

Chicken Fricassée and Spicy Moroccan Carrot Salad

The days are getting shorter. These are dangerous days, as Joel referred to them the other day, because the weather is getting cooler, which causes you to revisit the sweaters and long pants in your wardrobe, which makes you remember what nice clothes you have during other times of the year. They're like old friends you haven't seen for awhile. And when you put your shorts back on, you pine a little for the long pants, for getting to bundle up with those knitted scarves and hats, and for eating dinner in the dark. No, wait. I will never look forward to dinner in the dark. And no, I will never wish away summer.

I've noticed the light levels change in my now-shadowy walk to the bus stop, and when I arrive at the bus plaza, where the sun hasn't quite reached the bench where I sit at 7:15 a.m. like it usually does in the height of summer.

It's 7:30 p.m. now, time for dinner, and the sun is behind the houses and the kitchen feels dark. These are heavy chicken dinner days. And anyway, I kind of missed cooking with my French oven these last few months.

And so, from my heaviest cookbook, I Know How to Cook, I lend you this recipe for Chicken Fricassée.

You should probably hold off until the weekend to make such a meal, but it's a good experience for those of us who are up for a challenge. IKHC recipes are brief instructions and aren't for the inexperienced. It doesn't hold your hand through the process but rather expects that you've done this stuff before or have observed it done by someone else (your French mom). I'm providing the recipe for Chicken Fricassée with my notes and adjustments so you know precisely how I made it (and enjoyed it). You could look up other variations to find just the right taste for you, but I must say this was a nice baseline for someone who had never had the dish, but really just relished in saying the name (chicken frick-a-see!).

Also, a note about how the French make rice: they boil it like pasta, which means you keep the lid off and don't care about the amount of water that goes into it, as long as it's enough for the rice to boil freely. The recipe for "Indian rice" that the cookbook calls for in this dish adds butter plus baking in a slow oven after it's mostly cooked. I think you could make regular rice and be just fine, but the butter creates a creamier taste. 

Chicken Fricassée with Indian Rice
adapted from I Know How to Cook
serves 4, with some left over

3 1/2 lbs. chicken pieces (bone-in, skin-on)
1 bouquet garni (whatever herbs are in your garden; I used a couple sprigs each of rosemary and thyme)
1 carrot, sliced
1 onion, sliced
4 T. butter
scant 1 c. white wine (I used Pinot Gris)
salt and pepper
1 batch of Indian Rice (recipe follows)
4 oz. crimini mushrooms, roughly chopped
juice of one small lemon, about 2 tsp., or to taste
2 egg yolks, beaten

First, you make a quick stock. Place chicken pieces in a heavy pot and cover with 6 1/3 c. water. Add the bouquet garni, carrot and onion. Bring to a boil and turn it down to a simmer for 20 minutes.

Drain the chicken pieces and pat them dry. Save scant 1 c. of the stock (and save the rest for future use!) and set aside. Melt butter in same pot over medium heat and return the chicken to the pot to fry for a few minutes. You don't need to let them brown; just turn them every couple minutes. After about 5 minutes, add the wine and the reserved cooking liquid, season with salt and pepper and boil it for 2 minutes, then reduce the heat and simmer for about 30 minutes.

In the meantime, prepare the rice. Remove the chicken pieces and cover them to keep them warm. Strain the liquid in the pot through a fine mesh strainer and return it to the pot. Bring the heat back up to medium and add the mushrooms, cooking until the liquid has reduced by a third. Add the lemon juice and egg yolks, stirring constantly to thicken the sauce.

You can return the chicken to the pot to coat in the sauce, or spoon the sauce over the chicken and the rice. 

Indian Rice
1 3/4 c. long-grain white rice
2 T. butter

Preheat the oven to 300 degrees. Bring a large pot of salted water to boil. Add the rice and cook for 10 minutes. Drain and place in an oven-safe dish (with a lid), fold in the butter, close tightly with a lid and leave in the oven for 20 minutes.

Spicy Moroccan Carrot Salad (a nice accompaniment)
adapted from Plenty by Yotam Ottolenghi

Serves 4, as a side

1 lb. carrots, peeled and sliced into 1/2 in. thick circles
2 T. olive oil
half a medium onion, minced
1/2 tsp. sugar
2 garlic cloves, minced
1 jalapeño, minced (quantity of seeds to your taste)
1 green onion, sliced thin
pinch of ground cloves
1/8 tsp. ground ginger
1/4 tsp. ground coriander
1/2 tsp. ground cinnamon
1/2 tsp. sweet paprika
1/2 tsp. ground cumin
1 tsp. white wine vinegar
For serving, to taste
lemon
salt
fresh cilantro
Greek yogurt

Place carrots in a pot, cover with salted water and bring to a boil, then reduce to simmer for 8 minutes, leaving them a little crunchy. Drain them in a colander and let them dry a bit.

Heat the oil in a pan and cook the onions over medium heat, until soft and lightly browned, about 10 minutes. Add the carrots, garlic, green onion, jalapeño, all the spices and the vinegar. Remove from heat and sprinkle well with salt and stir. Let it sit for a bit to cool. This salad tastes lovely at room temperature.

When ready to serve, garnish as you wish with the lemon, salt, cilantro and yogurt. (Didn't use the latter two ingredients in this case, but will with the leftovers when I eat it for lunch!)